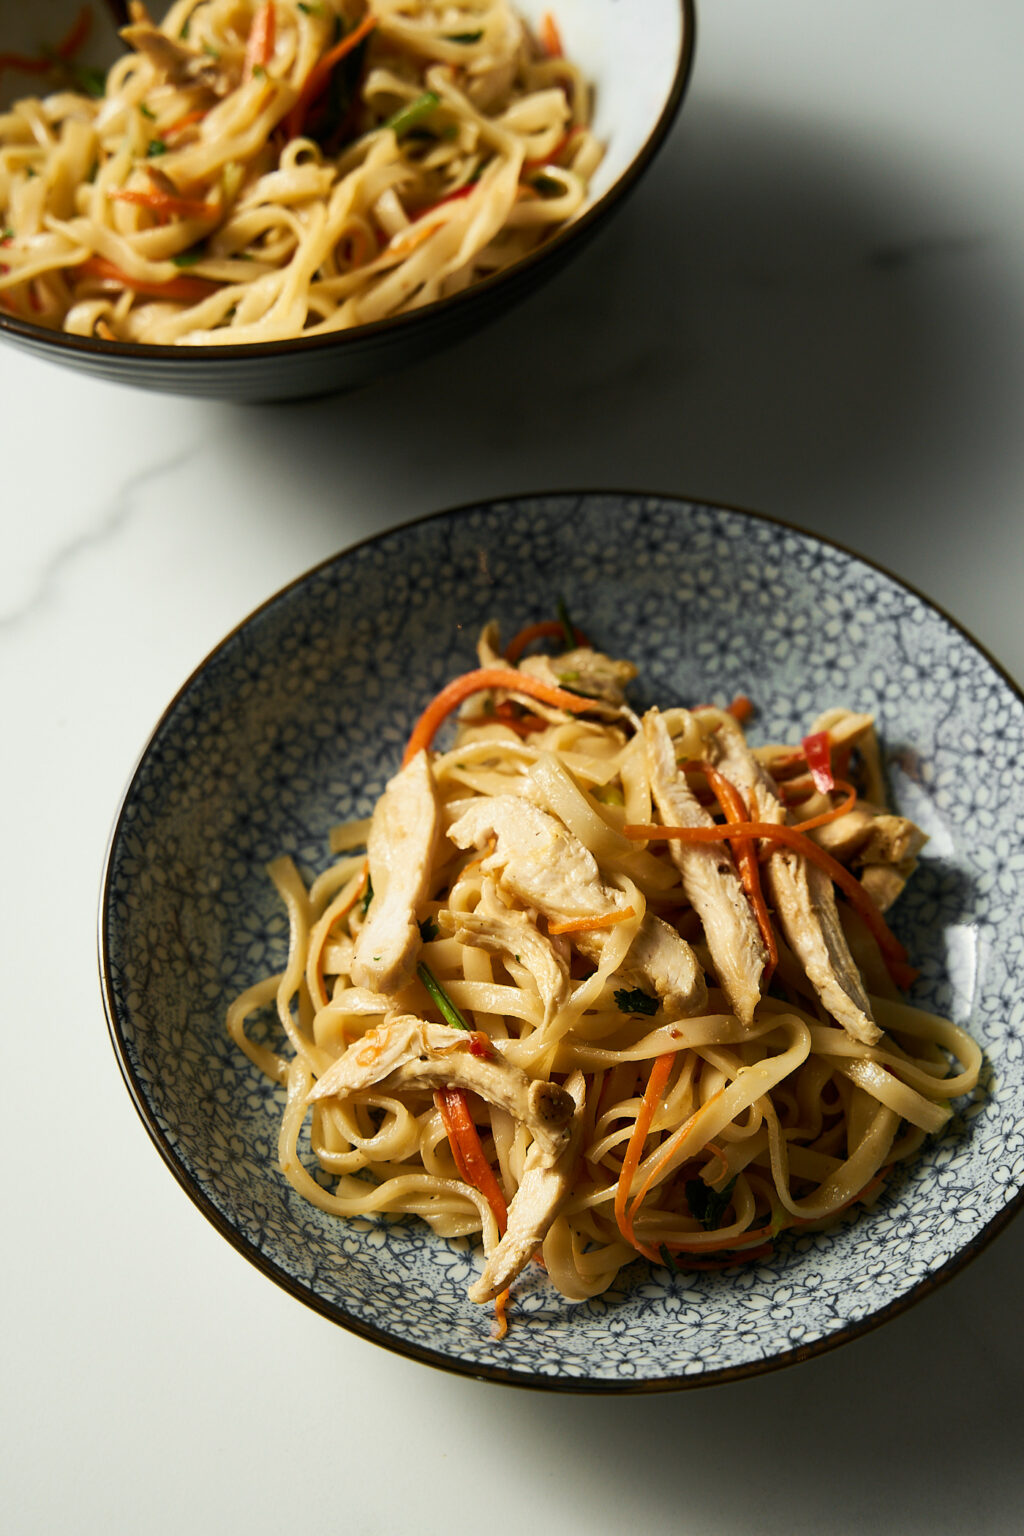
This exquisite and fragrant salad is considered a classic of Thai cuisine. Every region of Thailand can boast its unique version. But, like many other Asian dishes, they share a common concept — the combination of sweet, salty, sour, and spicy in one dish.
The history of the Thai salad with chicken and rice noodles dates back to ancient times. According to one legend, this dish was prepared for a Thai king who wanted to try something new and unusual. Since then, the salad has won the hearts of many gourmets around the world.
One of the features of this version of the salad is the use of sweet chili sauce. It gives the salad a sweetish taste and makes it softer and more balanced. This distinguishes it from spicier variations, allowing you to enjoy all the nuances of taste without being distracted by excessive spiciness.
However, those who prefer it “hotter” can always add ½-1 tsp. of roasted chili powder.
The taste of this salad is complex and layered. The tender chicken meat harmoniously combines with crispy vegetables and soft rice noodles. Lime juice, ginger, and garlic add acidity and spiciness, while sesame oil and sauces enrich the taste.
Cilantro and mint give the salad a summer, refreshing aroma that perfectly complements the other ingredients.
Another advantage of the Thai salad with chicken and noodles is its versatility and the ability to use leftovers of already cooked chicken. If you have leftovers of boiled, baked, or fried chicken, you can easily reduce the cooking time by 10-15 minutes.
Contents
⏱ Cooking time — 2 hours and 45 minutes overall. Includes 35 minutes of preparation and cooking + 2 hours and 10 minutes unattended.
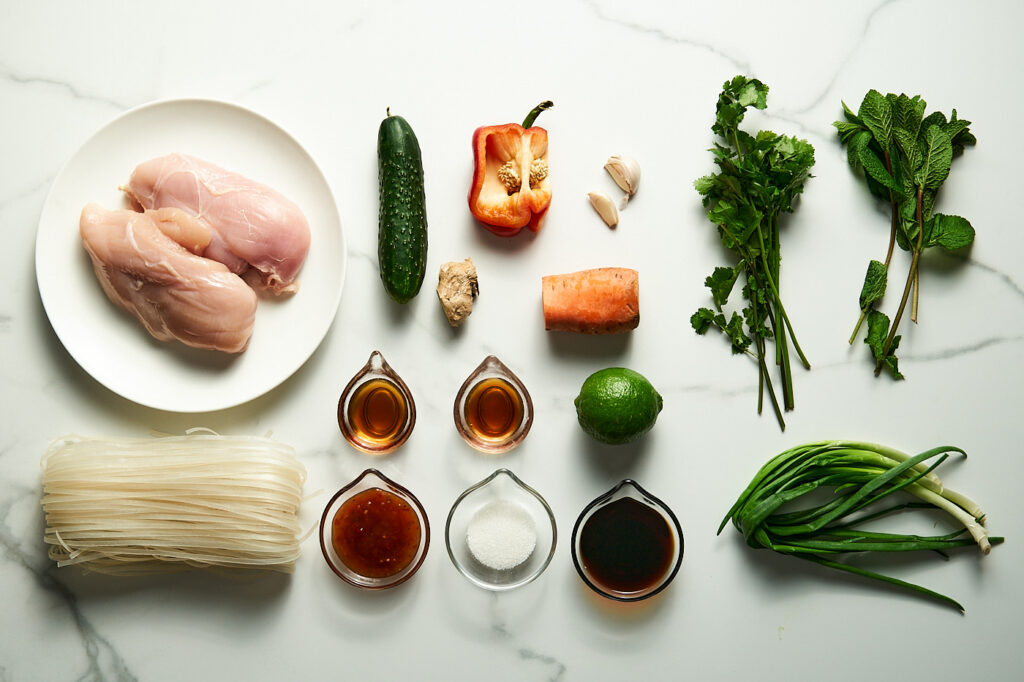
🥣 Ingredients
🍽 For 4 servings:
- 2-3 chicken breasts
- 200 g (7.05 oz) rice noodles
- 1 cucumber
- ½ carrot
- ½ bell pepper
- 3-4 green onion stalks
- a few sprigs of cilantro
- a few sprigs of fresh mint (don’t have? Use one of this substitutes)
- roasted cashews or peanuts (optional)
- vegetable oil
- pinch of salt
Dressing:
- 50 g (3⅓ tbsp.) sweet chili sauce (1.8 oz)
- 50 ml (3⅜) tbsp.) soy sauce (1.7 oz)
- 20 ml (1⅓ tbsp.) fish sauce (0.7 oz)
- 15 ml (1 tbsp.) lime juice (juice of half a lime) (0.5 oz)
- 2 garlic cloves
- 1 tbsp. sugar
- 15 g (1 tbsp.) ginger (0.5 oz)
- 15 ml (1 tbsp.) sesame oil (0.5 oz)
- ½ tsp. ground roasted chili (optional)
🔪 Directions
Preparing chicken for frying
Take 2-3 chicken breasts, separate the small fillet, and cut them into slices approximately 1 cm thick, like a schnitzel.
I cut at an angle, but you can also do it in the traditional way – cutting the fillet, holding the knife parallel to the board.
If the chicken is straight from the refrigerator – it needs to be allowed to warm up at room temperature for at least 30-40 minutes, or better for 1 hour.
Heat a large skillet over medium heat. Add vegetable oil and also heat it.
Frying the chicken fillet
Salt the chicken breast on top and place it in the pan with the salted side down. Don’t try to fit and fry all the breasts at once, it’s better to divide the process into 2 stages.
If you overload the pan, the temperature will drop too much and you’ll end up with stewed chicken instead of beautifully fried chicken fillet with a golden crust.
After you put the fillet in the pan, salt it on the other side too.
Cook for a couple of minutes on one side and flip. Fry on the other side for another 2-3 minutes, until the temperature inside the piece reaches 65°C (149°F). Time-wise, this will take about 5-6 minutes of total cooking time for thinner pieces and 6-8 minutes for thicker ones.
But of course, a lot depends on the pan, the degree of heating, and the initial temperature of the chicken. Therefore, I highly recommend getting a thermometer to avoid guessing.
Transfer the cooked pieces to a plate.
I flip the thicker pieces again after 3 minutes of frying on the other side and cook for about another minute.
Fry the remaining chicken fillet in the same way.
Preparing the vermicelli and sauce
Fill a pot with water and salt generously. Cover with a lid, put it on the heat and bring it to a boil. Once it boils, add 200 g of rice vermicelli and cook it for about 5 minutes (or as directed on the package).
Stir the vermicelli at the beginning of the cooking process to prevent it from sticking. When it’s ready, drain it in a colander and rinse under cold water, let it drain over the pot, adding a little oil and stirring so it doesn’t stick together.
If you have very long vermicelli, I recommend cutting it with scissors, shortening it by 2-3 times. This will make it easier to eat and work with.
Cut a lime in half and squeeze the juice from half a lime into a small dish. Add 15 ml of sesame oil (1 tbsp.), 1 tbsp. of sugar, 50 ml of soy sauce (~3 ½ tbsp.), 20 ml of fish sauce (1 ⅓ tbsp.), and 50 g of sweet chili sauce (3 ⅓ tbsp.) to the same dish.
Finalizing the sauce preparation
Peel 2 cloves of garlic and 15 g of ginger (~1 tbsp.) and grate them on a fine grater.
Add the grated garlic and ginger to the sauce, stir well.
Taste the sauce, and add more lime juice if necessary.
Preparing the vegetables
Cut off the ends of the cucumber and cut it in half. Use a spoon to remove the core.
Peel half a carrot. Remove the core and partitions from half a sweet pepper.
Slice the vegetables into thin strips. I do this using a mandoline slicer to speed up the process. I cut the cucumber with a knife, it’s more convenient this way.
Transfer the vegetables to a plate or bowl and set aside.
Preparing the herbs and chicken fillet
Chop the white part of 3-4 green onion stems and add to the vegetables.
Cut the green part into feathers, diagonally, and set aside.
Remove the mint leaves from the stems, discard the stems. Put the mint together with a few cilantro stems and roughly chop them.
By this time, the cooled chicken fillet should be shredded OR cut into thin pieces OR part of the chicken can be shredded, and part can be cut into thin pieces. Set aside.
Mix the salad
Place the vermicelli in a large bowl and gently separate it with your hands.
Add ~¾ of the chicken, leaving the sliced pieces for garnishing the salad on top.
Add the julienned vegetables and herbs. Mix well.
Add the sauce and mix again.
You can serve it right away, but it’s better to cover it with plastic wrap and refrigerate for 2 hours.
Garnishing the salad and serving
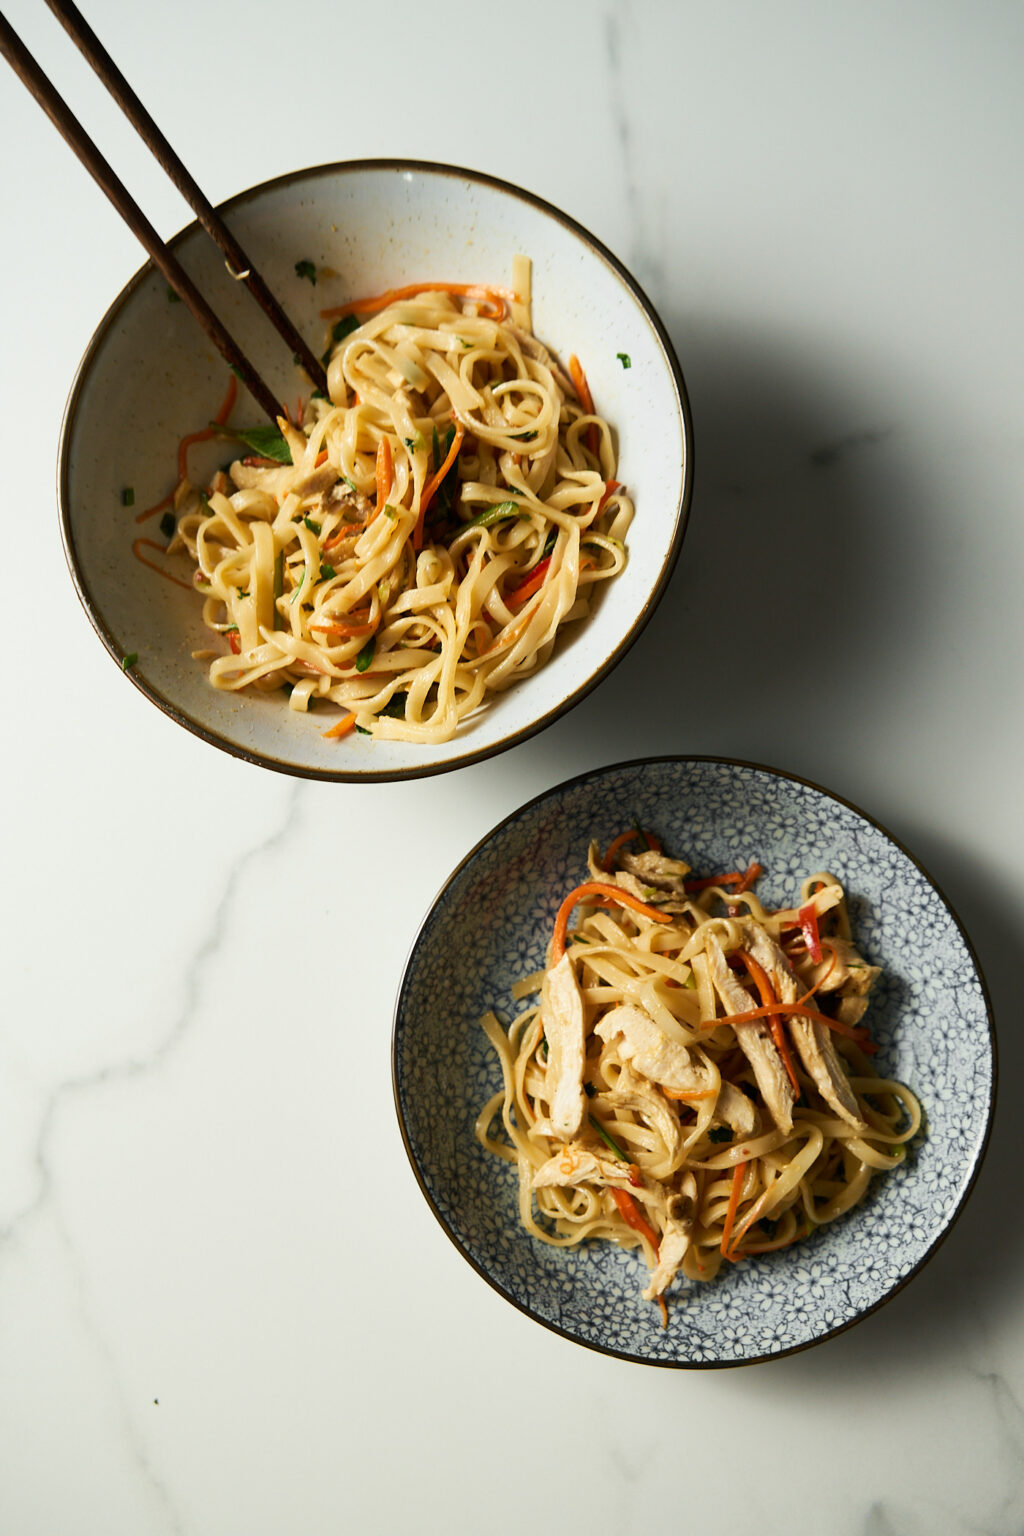
After 2 hours, take the salad out of the refrigerator and mix well again.
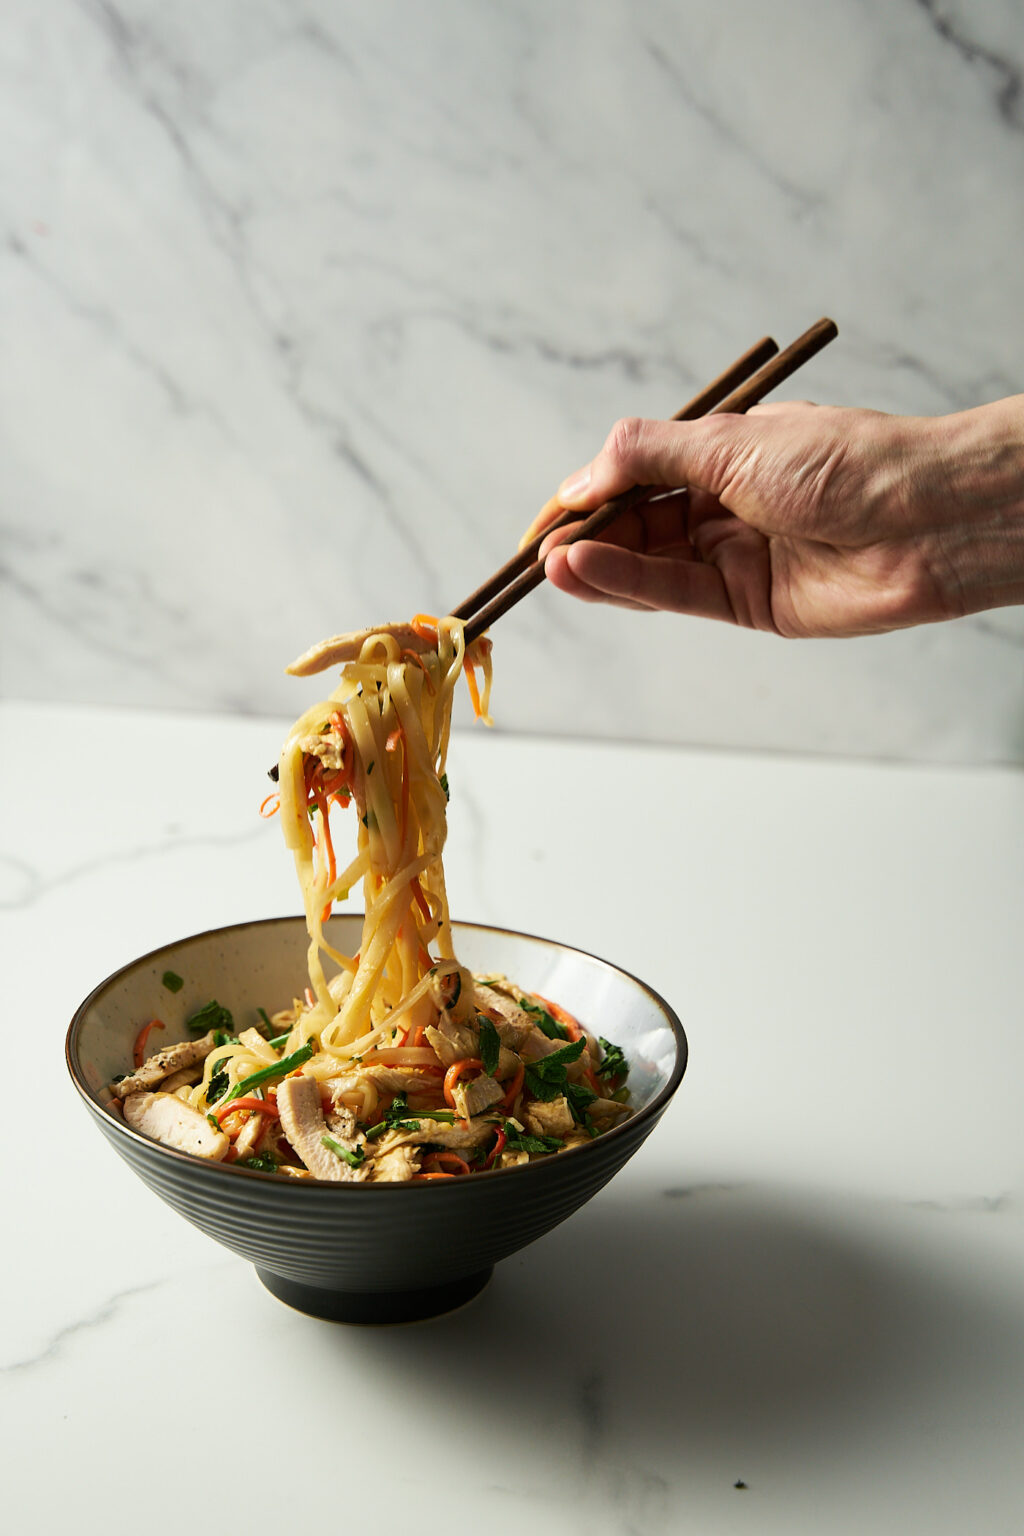
Transfer the salad to a dish, garnish the top with the sliced chicken pieces, the remaining herbs, and green onion feathers.
Serve.
If the salad seems a bit dry, add a little more soy sauce and/or vegetable oil.
📋 Substitutes
Chicken Breast – Turkey: the taste will be more tender, but the characteristic taste of poultry will be preserved; tofu: will make the dish vegetarian, will add a soft, neutral taste.
Rice Vermicelli – Glass Noodles: has a similar texture, but is less dense and transparent; udon: Japanese wheat noodles, will be more dense and chewy in taste; Italian spaghetti: will make the salad more European.
Cucumber, Carrot, Bell Pepper – if desired, replace with other vegetables to your liking, such as: zucchini, squash, parsnip, beetroot, tomatoes, shallots.
Green onions, cilantro, mint – I recommend leaving as is.
Cashews or peanuts – other nuts, such as walnuts, sunflower seeds or pumpkin seeds.
Sweet Chili Sauce – replace with ketchup or exclude entirely.
Fish Sauce – Oyster Sauce (20 ml): less salty, sweeter taste, you may need to adjust the amount of sugar.
Lime Juice – Lemon Juice (15 ml): less tropical, but preserving acidity; vinegar (10 ml): more sour and sharp aroma.
Garlic – granulated or dried garlic powder (½ tsp): less intense, but preserving the taste of garlic.
Sugar – Coconut Sugar, Palm Sugar, Brown Sugar. (1 tbsp.): will give a more delicate caramel taste.
Ginger – Ginger Powder (½ tsp.): less spicy, but preserving the taste of ginger.
Soy Sauce, Sesame Oil – I recommend leaving as is.
Ground Roasted Chili – Cayenne Pepper (½ tsp.)
🌶️ Variations
- Replace chicken with shrimp or beef steak, as in Thai beef salad.
- Add some chopped mango or pineapple to add a sweet, fruity, and exotic flavor.
- Vary the vegetables by adding shredded red cabbage, which will give the dish a crunchy texture and bright color.
- Instead of or in addition to cilantro and mint, use other herbs, such as Thai basil or lemongrass.
- Add thinly sliced red onion for an additional crunch and flavor.
- Instead of frying the chicken in a pan, you can grill it for a smoky aroma, as well as bake or boil it to make a healthier option.
- Add a bit of minced lemongrass and lime zest to the dressing to give it an extra kick and aroma.

Thai Noodle Chicken Salad

Ingredients
- 2-3 chicken breasts
- 200 g rice noodles
- 1 cucumber
- ½ carrot
- ½ bell pepper
- 3-4 green onion stalksa
- a few sprigs of cilantroa
- a few sprigs of fresh mint
- roasted cashews or peanuts (optional)
- vegetable oil
- pinch of salt
Dressing:
- 50 g sweet chili sauce (3⅓ tbsp.)
- 50 ml soy sauce (3⅜ tbsp.)
- 20 ml fish sauce (1⅓ tbsp.)
- 15 ml lime juice (1 tbsp.) (juice of half a lime)
- 2 garlic cloves
- 1 tbsp. sugar
- 15 g ginger (1 tbsp.)
- 15 ml sesame oil (1 tbsp.)
- ½ tsp. ground roasted chili (optional)
Instructions
- Slice the chicken breasts into 1 cm thick slices. Allow the chicken to warm to room temperature (30-60 minutes). Heat a pan over medium heat, add oil.
- Salt the chicken, fry in a pan for 2-3 minutes on each side.
- Boil the rice vermicelli in boiling salted water for 5 minutes. Drain the vermicelli and rinse with cold water. Mix the ingredients for the sauce: lime juice, sesame oil, sugar, soy sauce, fish sauce, sweet chili sauce.
- Grate garlic and ginger on a fine grater. Add them to the sauce, mix. Taste the sauce, add more lime juice if needed.
- Cut the cucumber in half, remove the core, cut into strips. Peel the carrot, remove the core of the bell pepper, cut into strips.
- Cut the white part of the green onion, cut the green part into feathers. Separate the mint leaves, chop together with cilantro. Divide the cooled chicken fillet into fibers or cut into thin pieces.
- Place the vermicelli in a large bowl, add ¾ of the chicken, vegetables, and greens, mix. Add the sauce, mix and chill the salad in the refrigerator for 2 hours.
- Stir the salad, transfer to a dish, garnish with chicken and remaining greens. If necessary, add additional soy sauce or vegetable oil.
