Kabab Kооbideh is a popular Middle Eastern dish made from ground meat, usually beef or lamb, mixed with spices and shaped into oblong shapes.
It is fried on broad skewers and served with rice, bread, or vegetables. In Persian cuisine, there is a variant of this dish in which ground chicken is used instead of red meat.
This juicy, flavorful, and easy-to-make dish is ideal for a barbecue outdoors, which would be great. I, on the other hand, will show you how to make chicken kebab koobideh at home, using an oven and a frying pan.
While it may not compare to a kebab cooked over charcoal, it’s better than nothing.
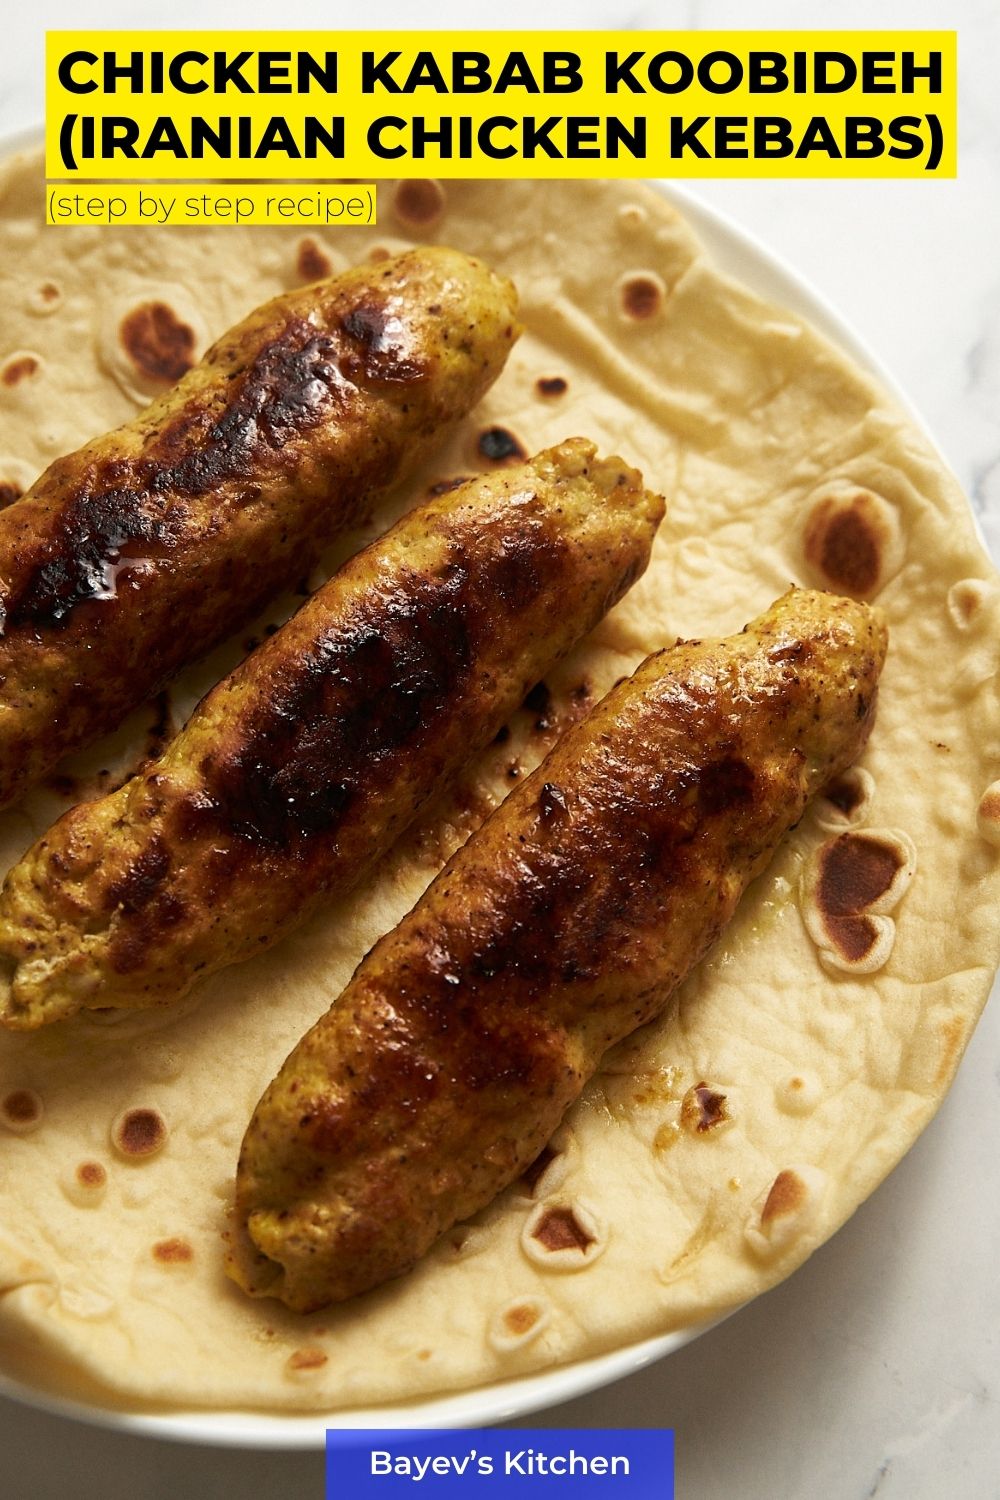
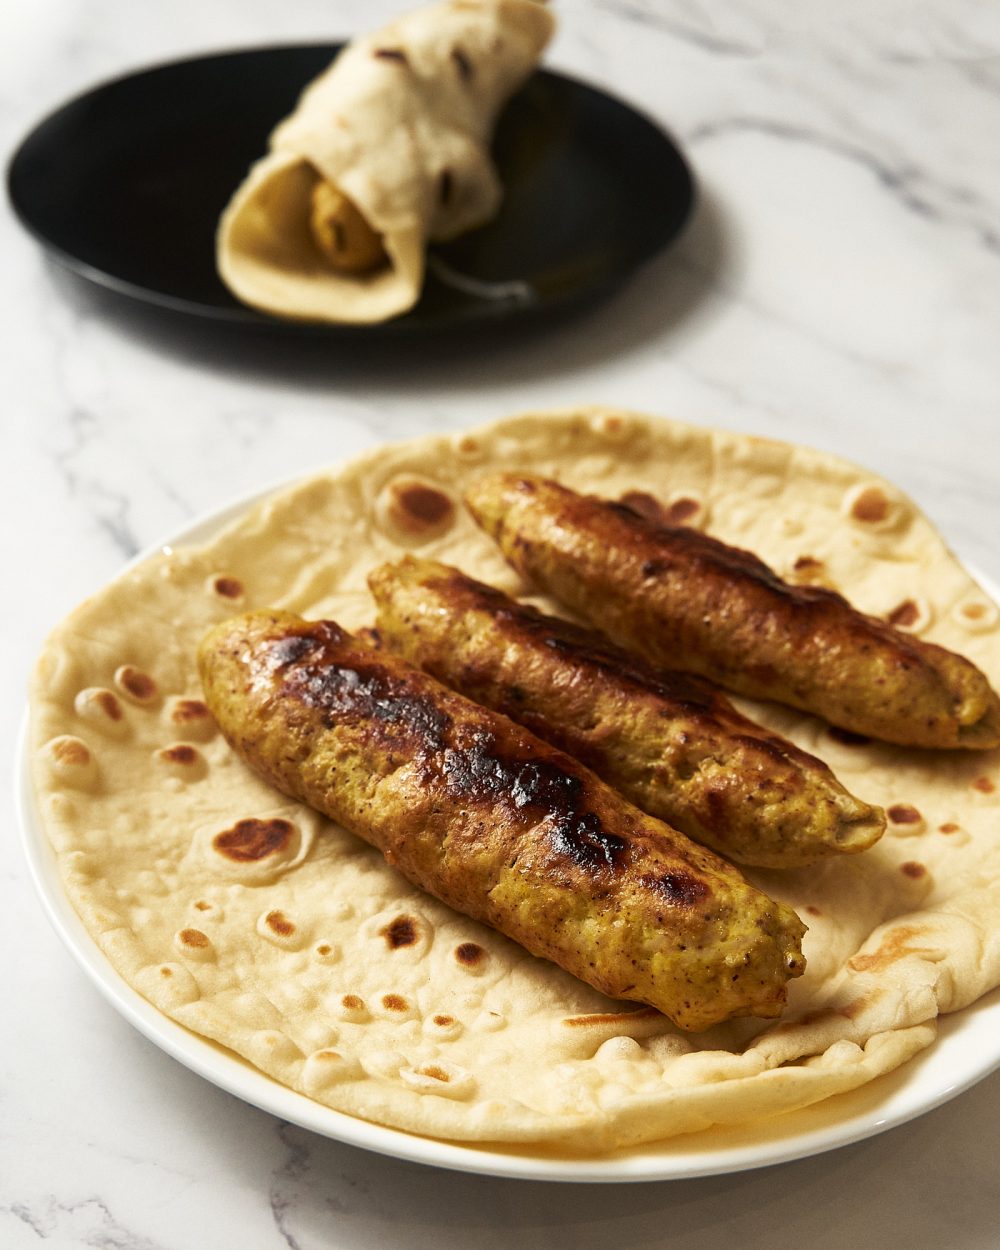
After roasting, the finished kebab is wrapped in pita and removed from the skewer. Leaving you alone with this kebab and without a recipe for thin, soft lavash, I certainly could not. So catch it and don’t forget to pre-cook it.
You can add your favorite vegetables and herbs to the pita, wrap it up tightly, and eat the kebab like shawarma, or you can spread the pita on a plate and serve it with salad and rice.
⏲️ Cooking time — 60 minutes overall. Includes 30 minutes of preparation and cooking + 30 minutes unattended.
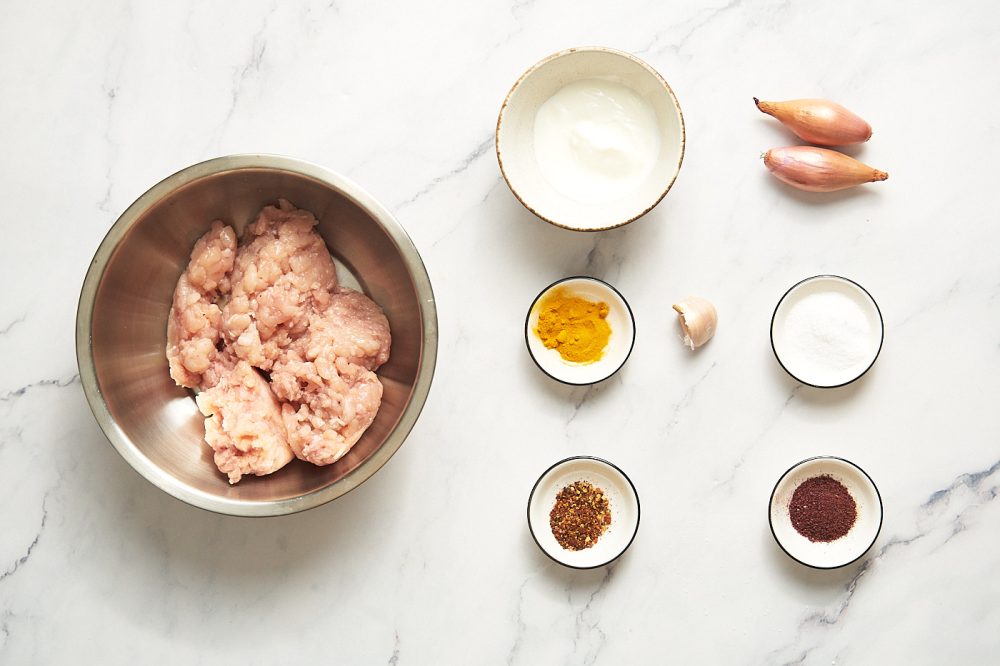
🥣 Ingredients
🍽 For 4 kebabs:
- 500 g (1,1 lb) minced chicken (I used minced filet, but a 70/30 to 50/50 mix of filet and thighs is better)
- 1/2 tsp. turmeric
- 1/2 tsp. chili flakes (I used roasted chili powder)
- 1 tsp. sumac
- 2 shallots (you can substitute 1 medium sized yellow onion)
- 2 garlic cloves
- 2 tbsp. full-fat greek yogurt
- 50 g (3.5 tbsp.) butter
- 1 tsp. salt
Optional:
- 4 skewers (wide, the wider the better)
🔪Step by step Directions
Preparing
Cut 2 shallots in half and peel.
Crush 2 cloves of garlic, put a knife on it with the back of the knife and strike it with your fist and peel it.
Transfer 500 g (1,1 lb) of minced chicken to a bowl and rub the peeled onion and garlic directly into it.
Add 1 tsp. salt, 1 tsp. sumac, 1/2 tsp. turmeric, 1/2 tsp. ground chili, 2 tbsp. yogurt, 50 g (3.5 tbsp.) butter.
Mix the minced meat with the spices
Stir and knead the stuffing with your hands. Knead for about 2-3 minutes to mix everything properly. Cover with clingfilm and put in the fridge for half an hour.
If there is no time – you can start cooking right away. But for half an hour in the refrigerator minced meat will be more saturated with flavors of spices, and butter and fat will solidify a little, which will simplify the work with minced meat in the future.
Place the minced meat on skewers and form kebabs
Take the bowl of minced meat out of the refrigerator, prepare skewers and a bowl of clean water.
Moisten your hand in the bowl with water and take 1/4 of the minced meat. Roll the minced meat on the side of the bowl to form it into a ball.
Try to make the ball as dense as possible, to do this, press the mince against the walls harder, squeezing out the excess air.
When the ball is ready – take a skewer, lean it against the side of the ball and sort of wrap the minced meat around the skewer. Now, pressing the stuffing with your hand, stretch it into a sausage about 20 cm (8 inches) long.
Moisten your hand in water again and try to achieve the same thickness along the whole length.
Press the edges of the kebab with your fingers so there is no hole.
Wet your hand again. Press the minced meat with your thumb to make diagonal grooves along the entire length of the kebab.
“Seal the kebabs” under the grill
Place the kabab skewer on the baking tray and shape the remaining kebabs.
Turn the oven on the grill, set the temperature regulator to maximum.
Place the kebabs on a baking tray lined with foil or parchment. So that the skewers lie on its sides, and kebabs overhang it.
When the upper heat of the oven is red hot, place the tray with the kebabs as close to it as possible. Cook for about a minute, then flip the skewers (without removing the tray from the oven, carefully – hot) and cook for another minute on the other side.
This is done to seal the meat. This way it will grip and not fall apart during roasting.
Take the tray out of the oven.
Roast the kebabs in a frying pan
Heat a large frying pan over high heat. Add about 1-2 tbsp. of vegetable oil and heat it for about 1 minute, reducing the heat to medium.
Remove the kebabs from the skewer and transfer to the pan. Pre-emptively nudge them lightly around the edges.
Cook for about 8 minutes, until 70°C (160°F) in the center of the piece, turning occasionally.
While flipping, also fry the kebabs on the sides, holding them with tongs.
My kebabs were in the fridge for about 2 hours, so they needed a little more time. If your kebabs are too badly fried on the outside but still raw on the inside, put the lid on, turn down the heat and cook for 2 to 3 minutes more.
Serve
Serve with lavash or pita bread, sprinkled with onions and your favorite herbs. Or with your favorite vegetable salad and rice.
💭 Cooking Tips:
- Quality of Meat: For a more flavorful Kabab, consider using a mix of chicken filet and thighs with a ratio of 70/30 or 50/50.
- Spices: The use of sumac, turmeric, and chili gives a traditional Middle Eastern flavor to the Kabab. Feel free to adjust the quantities to your liking.
- Marinating Time: Allowing the marinated meat to rest in the refrigerator for at least half an hour can enhance the flavor as it gives time for the meat to absorb the spices.
- Preparation of Kebabs: Wet your hands before shaping the minced meat onto the skewers. This helps to prevent the meat from sticking to your hands and makes the process easier.
- Cooking Technique: Cook the kebabs under a hot grill for a minute on each side to seal the meat. This helps the kebabs to hold their shape during further cooking.
- Serving Suggestions: These kebabs can be served with pita bread or lavash, sprinkled with onions and your favorite herbs. They are also delightful when served with a side of salad and rice.
How to Make Koobideh without Skewers:
If you don’t have skewers, you can still make Koobideh by shaping the kebabs into sausage shapes by hand. Once shaped, place them onto a baking tray and cook in a preheated oven. Be sure to turn them occasionally to ensure they cook evenly. Although not traditional, this method is a practical alternative.
How to Make Air Fryer Koobideh:
You can use an air fryer to make Koobideh with some minor adjustments:
- Preheat your air fryer at 200°C or 400°F for a few minutes.
- Instead of skewering the meat, shape it into a sausage form and place them in the air fryer basket. Be sure not to overcrowd them for even cooking.
- Cook them at 180°C or 360°F for about 10-12 minutes. Flip them halfway through to ensure even browning.
- Check for doneness by ensuring they’ve reached an internal temperature of 70°C or 160°F.
- Serve hot with your choice of side dishes.
Remember, the cooking time might vary slightly based on the model and power of your air fryer.
📋 Substitutes
Minced chicken — Ground turkey (1.1 lbs), turkey has a similar texture but its taste is slightly more delicate compared to chicken; Ground beef (1.1 lbs), beef will give a more robust, meatier flavor to the kebabs.
Turmeric — Curry powder (1/2 tsp.), curry powder can provide a similar yellow color and also adds an aromatic and slightly spicy flavor; Saffron (a few strands), saffron has a unique aroma and will give a slightly different flavor along with a similar yellow color.
Chili flakes — Cayenne pepper (1/2 tsp.), cayenne provides a similar heat and spice; Crushed red pepper (1/2 tsp.), crushed red pepper will give a similar spiciness but also a little bit of crunchiness.
Sumac — Lemon zest (1 tsp.), the zest will provide a similar tartness, but also a slightly bitter flavor; Ground coriander (1 tsp.), coriander will provide a slightly citrusy and sweet flavor.
Shallots — Red onion (1 medium-sized), red onion has a similar taste but slightly more intense; Leek (1 medium-sized), leeks provide a milder and sweeter flavor.
Garlic cloves — Garlic powder (1/2 tsp. per clove), provides a similar flavor but may be slightly milder; Asafoetida powder (1/4 tsp. per clove), asafoetida provides a strong, concentrated flavor, so use sparingly.
Full-fat Greek yogurt — Sour cream (2 tbsp.), sour cream will provide a similar creaminess and tang; Plain full-fat yogurt (2 tbsp.), will have a similar texture and slightly less tangy flavor.
Butter — Ghee (3.5 tbsp.), ghee will provide a similar richness but slightly nuttier flavor; Coconut oil (3.5 tbsp.), coconut oil can add a subtly sweet and tropical flavor.
Salt — Kosher salt (1 tsp.), kosher salt provides a less salty flavor due to its larger crystals; Sea salt (1 tsp.), sea salt has a slightly briny flavor and can provide a different texture.
Skewers — Metal skewers (4 pieces), metal skewers can be a good alternative to wooden ones and don’t require soaking; Rosemary branches (4 pieces), rosemary branches will provide an additional herby flavor to the kebabs. However, be aware that they can catch fire if not properly soaked before grilling.
🧊 How to Store
Cooling:
Allow the cooked Chicken Koobideh Kababs to cool at room temperature for about 10-15 minutes before proceeding with any storage methods. This is to prevent excess steam from creating moisture, which can lead to bacterial growth during storage.
Refrigerating:
- After the kababs have cooled, place them in airtight containers or resealable plastic bags. If you have any sauces or dips accompanying your dish, store them separately to keep the kababs from becoming soggy.
- Store the kababs in the refrigerator. They can stay fresh for up to 3-4 days when refrigerated at a temperature below 40°F (4°C).
Freezing:
- For longer storage, you can freeze the Chicken Koobideh Kababs. First, let the kababs cool completely at room temperature.
- Place the kababs on a baking sheet lined with parchment paper, making sure they are not touching each other. Freeze them initially for a couple of hours.
- Once the kababs are individually frozen, transfer them to airtight freezer-safe containers or heavy-duty freezer bags. This method prevents the kababs from sticking together, allowing you to take out as many as you need at a time.
- Properly stored, they will maintain the best quality for about 2-3 months, but will remain safe to consume beyond that time.
Reheating:
- When you’re ready to eat, let the frozen kababs thaw overnight in the refrigerator. If in a hurry, you can also defrost them in the microwave but be careful not to overdo it and start cooking them.
- Reheat the kababs in a preheated oven at 375°F (190°C) for about 10-15 minutes, or until heated through. You can also reheat them on the stovetop in a skillet over medium heat.
- If the kababs seem too dry, consider covering them with foil while reheating in the oven or adding a splash of water in the skillet.
Always remember that food should only be reheated once for food safety reasons, so only thaw and reheat what you plan on eating.
🥗 What to serve with?
- Saffron Rice. The fragrant and slightly sweet saffron rice acts as a beautiful canvas for the kabab koobideh. This combination is common in Persian cuisine and the yellow rice not only provides a contrasting color but also absorbs the juices and flavors from the kebab enhancing its taste.
- Tzatziki Sauce. This traditional Greek dip made from yogurt, cucumber, garlic, and fresh herbs brings a refreshing contrast to the hearty kabab koobideh. The creaminess of the tzatziki sauce pairs well with the succulent chicken and the garlic and herbs complement the spices used in the kabab.
- Grilled Vegetables. Grilled bell peppers, onions, tomatoes, and zucchini are a great addition to the meal. They add a smoky flavor which complements the charred taste of the kabab. Additionally, they provide a healthy, low-calorie side dish that balances the richness of the meat.
- Fattoush Salad. This vibrant Lebanese salad made with mixed greens, tomatoes, cucumbers, radishes, and crispy pita bread brings a crunch and freshness that works well with the dense kabab. The salad dressing typically includes lemon juice and sumac which echoes the flavors in the kabab.
- Hummus. This creamy Middle Eastern dip made from chickpeas, tahini, lemon juice, and garlic, pairs wonderfully with the kabab koobideh. Its smooth, rich texture and nutty flavor balance the spiced chicken, and it can be used either as a dip or spread on pita bread.
The proposed side dishes complement the Chicken Koobideh Kabab in terms of flavors, textures, and overall meal balance. Saffron rice offers a fragrant and slightly sweet base, Tzatziki sauce brings a refreshing contrast, grilled vegetables add a smoky flavor, Fattoush salad provides a crunchy freshness, and hummus contributes a creamy, rich balance. These combinations ensure a satisfying and complete meal experience.
Chicken Kabab Koobideh (Iranian Chicken Kebabs)
Equipment
- 4 skewers (wide, the wider the better)
Ingredients
- 500 g minced chicken (I used minced filet, but a 70/30 to 50/50 mix of filet and thighs is better)
- ½ tsp. turmeric
- ½ tsp. chili flakes (I used roasted chili powder)
- 1 tsp. sumac
- 2 shallots onions (you can substitute 1 medium sized yellow onion)
- 2 garlic cloves
- 2 tbsp. yogurt
- 50 g butter
- 1 tsp. salt
Instructions
- In a bowl with the minced chicken, grate peeled shallots and garlic cloves, add salt, sumac, turmeric, ground chilies, yogurt, butter.
- Stir and knead the mince with your hands for about 2-3 minutes until smooth. Cover with clingfilm and place in the refrigerator for 30 minutes. If there is no time – you can start cooking right away.
- Soak your hand in water, take 1/4 of the minced meat. Shape it into a ball, trying to make the ball as dense as possible.Put the minced meat on a skewer. Moisten your hand again and stretch the minced meat into a kebab length of about 20 cm, trying to achieve the same thickness. Moisten your hand, press the edges of the kebab with your fingers and with your thumb make diagonal grooves along the length of the kebab.
- Turn the oven to grill mode, set the temperature regulator to maximum.Place the kebabs on the edge of a high baking tray lined with foil or parchment, so the kebabs are hanging from the sides.Cook for about a minute, on the highest setting, as close to the tone as possible. Flip the skewers (without removing the tray from the oven) and cook another minute on the other side.Take the tray out of the oven.
- Heat a large skillet over medium heat, add about 1-2 tbsp. of vegetable oil.Remove the kebabs from the skewer and transfer to the skillet. Cook for about 8 minutes, until 70°C (155°F) in the center of the piece, turning occasionally. While flipping, also fry the kebabs on the sides.
- Serve with pita bread or pita bread, sprinkled with onions and your favorite herbs. Or with your favorite vegetable salad and rice.
