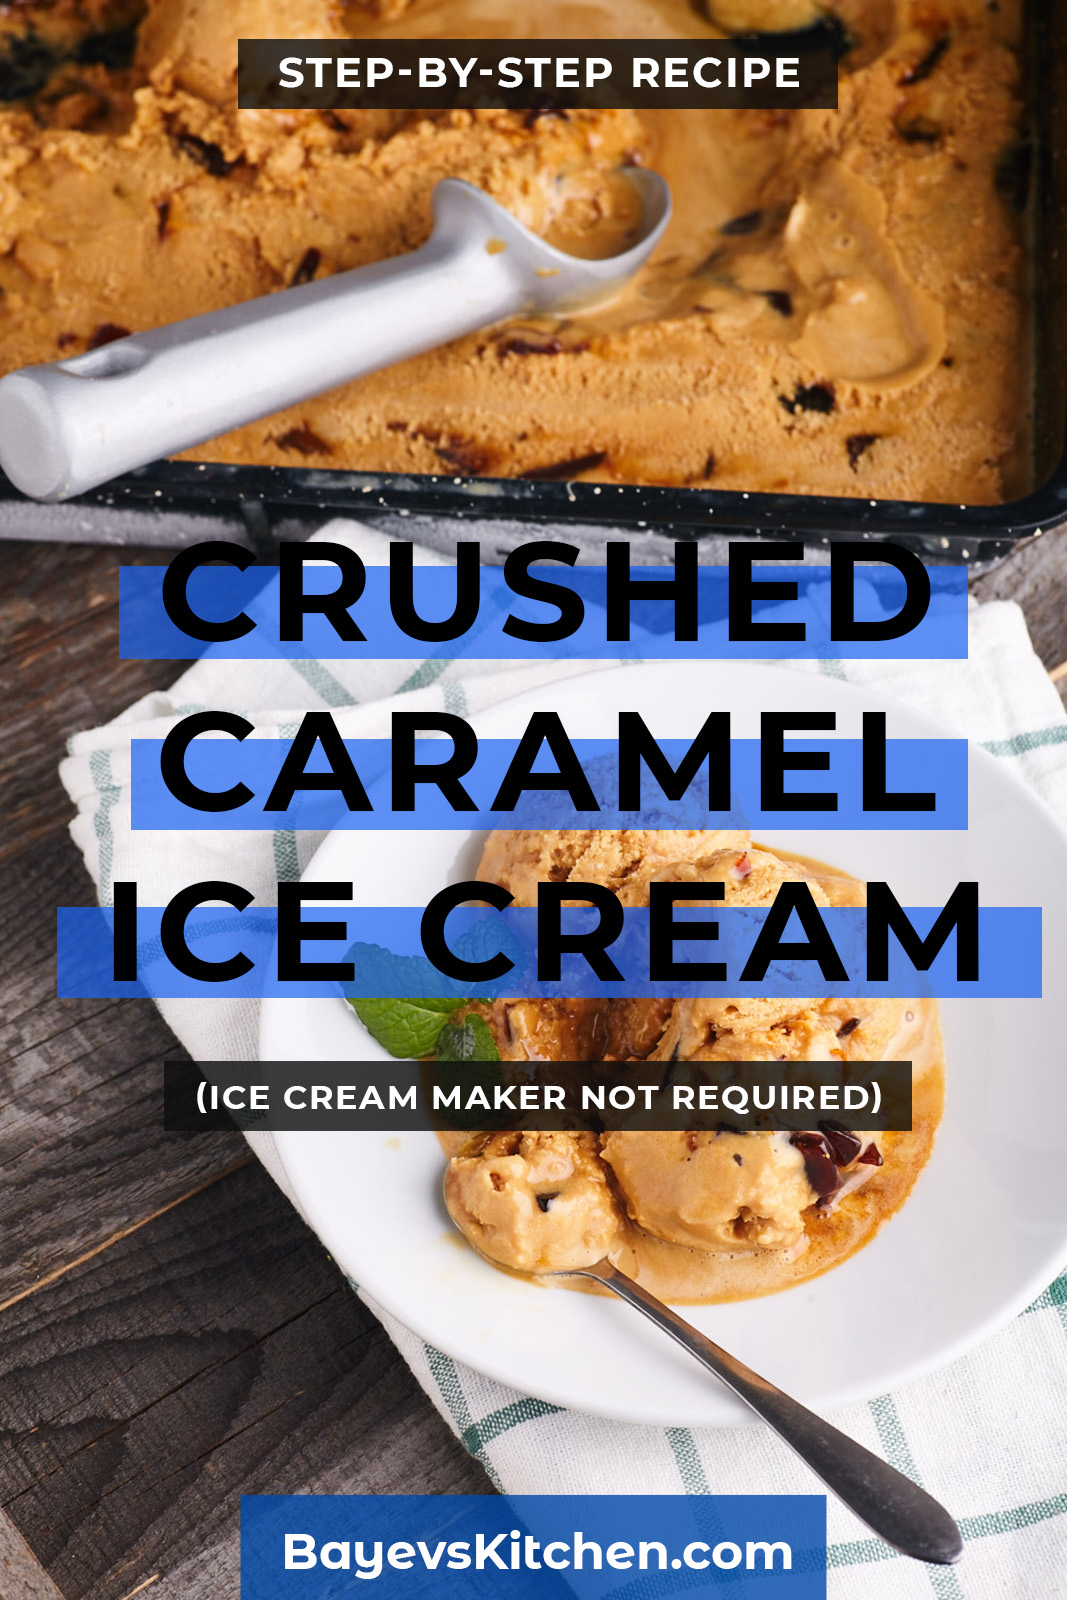
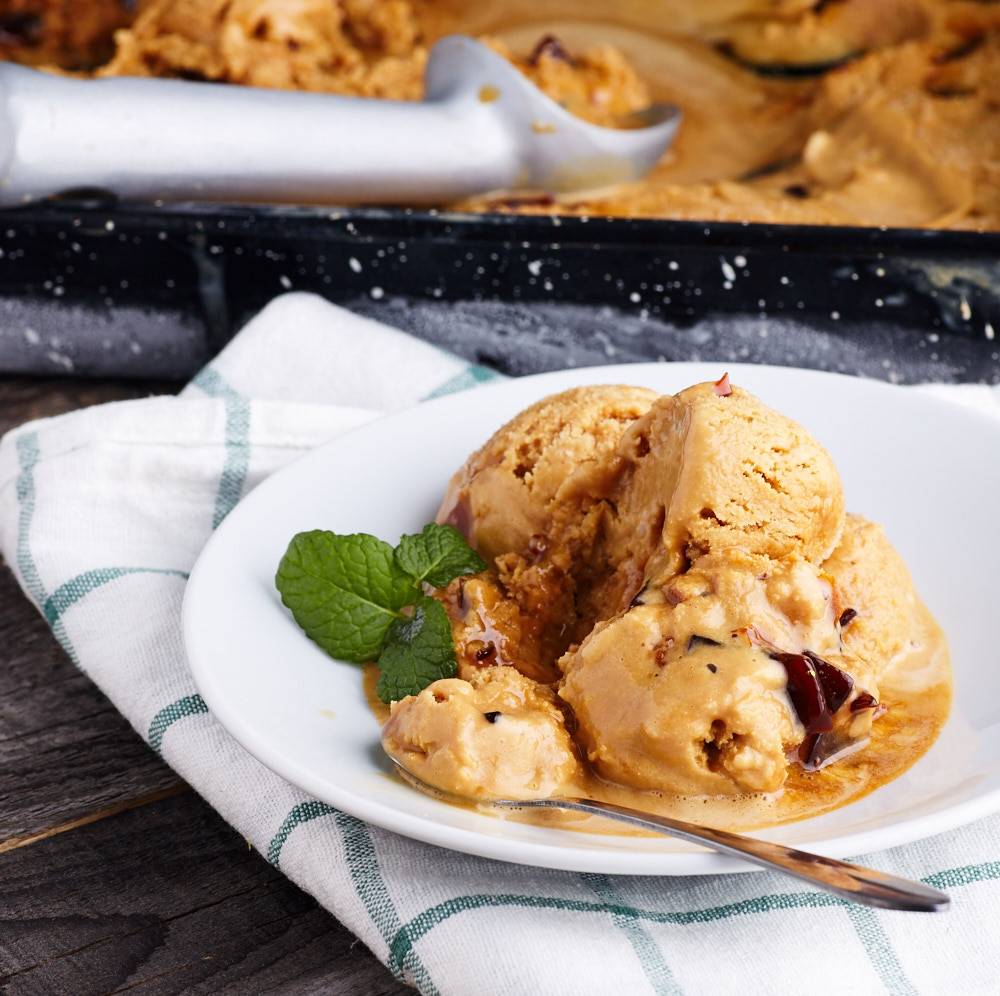
Caramel with caramel is just like chocolate with chocolate. When you hear something like this, you immediately imagine something very sweet, delicious and super creamy. After making this recipe, I can still see and taste it in my mind’s eye! Imagine the taste of cold, milky caramel ice cream, something similar to store bought crème brûlée, but much more intense. Add to this some fine bits of hard, crushed caramel, which give your taste buds a full-on hit of double caramel.
This recipe is a demonstration of the third and last method for making ice cream without an ice cream machine where I will show you the classic method of “freezing and stirring”. If you have prepared homemade ice cream before, you are probably familiar with this process. In this case, though, we will make some additions to the technology that will make the ice cream freeze faster and produce a better quality.
The essence of the additions, namely a pre-frozen metal container, super-freezing and others, I describe in the link above. Therefore, in this recipe I will speak only briefly about the freezing part. I’ll briefly tell you what needs to be done without describing the details.
I want to make it clear from the start that by “conventional freezer”, I mean a freezer with an internal temperature of –14 to -18 degrees; “super freezing” means a temperature range of –20 to -25. Accordingly, all timescales below are linked to these temperatures, but don’t worry, a few degrees of inaccuracy will not prevent you from making delicious ice cream.
Also consider the dimensions and shape of your container. The ice cream will solidify faster in a wide, shallow container than in a deep, narrow one.
What you need
Ingredients
- 450 g (15,9 oz) sugar
- 1 liter full cream milk
- 12 egg yolks
- Butter for greasing
Equipment
- mixer
- kitchen thermometer (not essential)
- kitchen scales (reccomended)
Cooking
Step 1. Preparation
5 hours before beginning, turn on the “super-freezing” mode on your freezer and put a metal container into the freezer in which you plan to freeze the ice cream mix. If you don’t have this mode, then just keep the freezer closed for 5 hours to get it as cold as possible.
Step 2. Ice Cream Mix
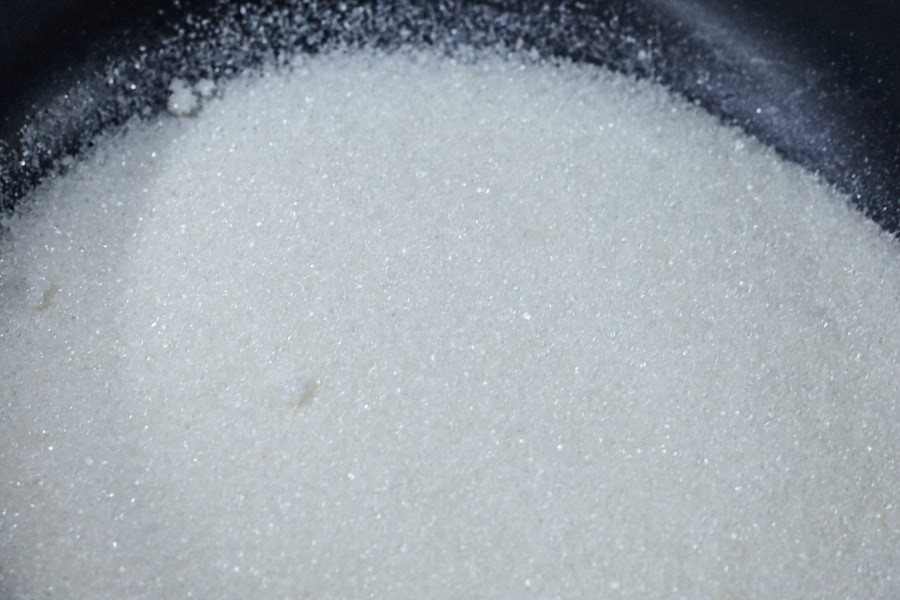
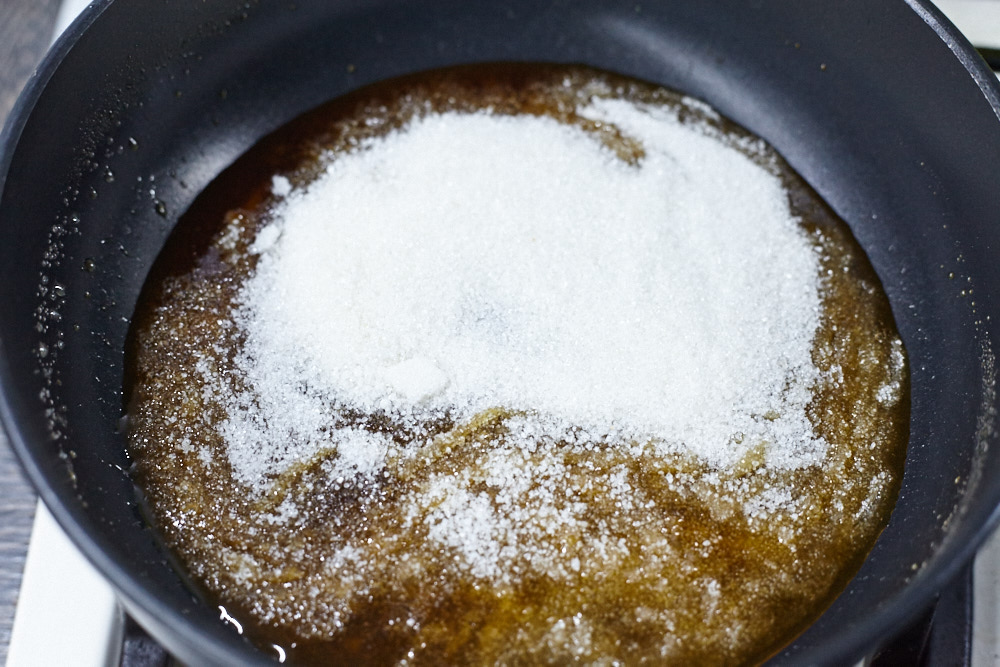
Measure 250 g (8,8 oz) of sugar and place it in a large saucepan with a thick bottom. This is to make the caramel and we need the sugar to fit on the bottom as thinly as possible to let it melt evenly and not get burned.
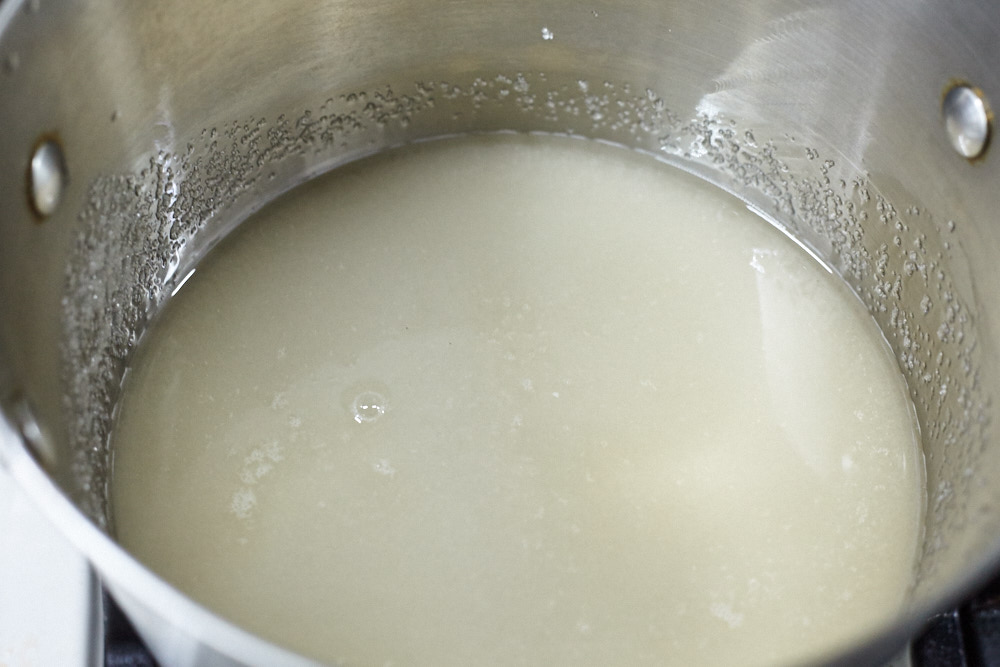
If you don’t have a big pot, take a smaller one (for example, I used a 2.5 liter pot), measure the right amount of sugar, pour in a small amount of water and stir it so that the sugar makes one even, wet layer at the bottom of the pot.
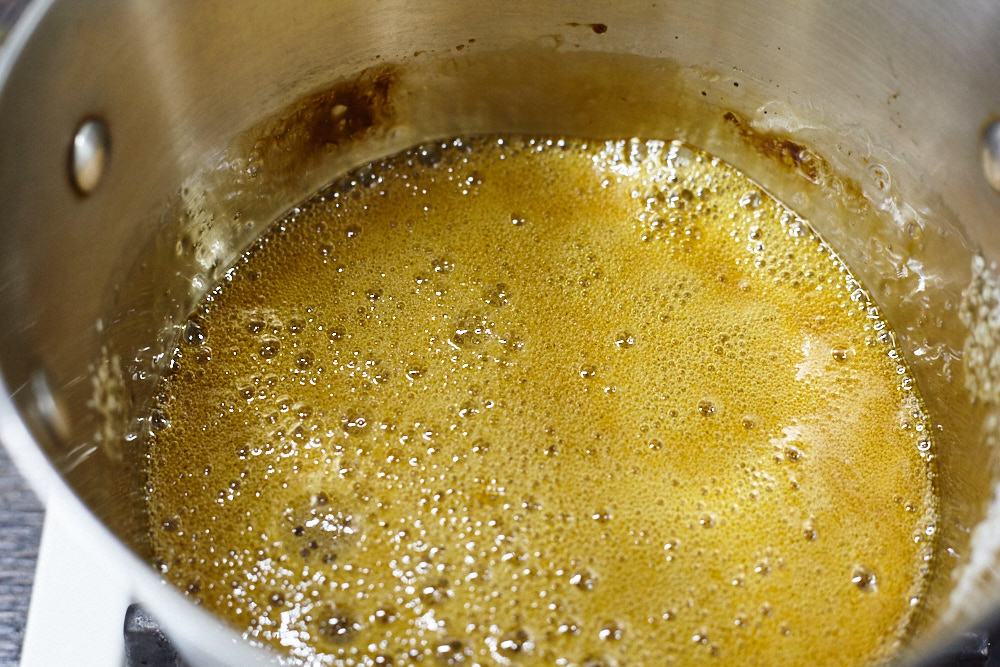
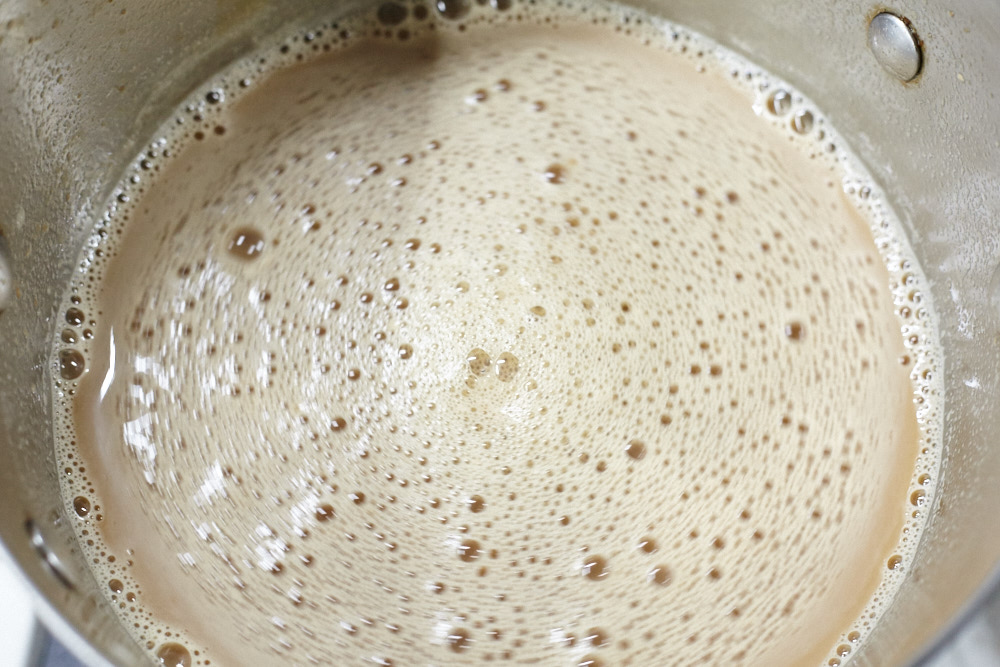
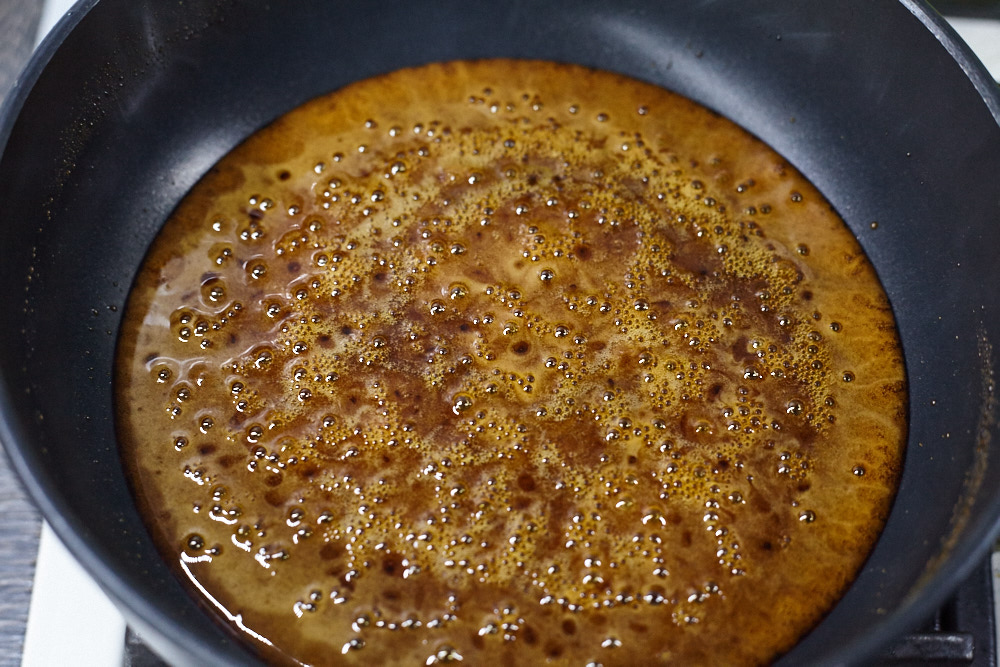
Place the saucepan on a medium heat and prepare the caramel: heat the contents without stirring so that they melt, bubble and become dark golden. In this recipe we don’t need any specific caramel consistency, so a kitchen thermometer will not be needed. We will orientate ourselves exclusively by color, smell and time. Everything will take you about 12 minutes. If you cook the sugar from dry, you will need less time.
Remember that you can’t mix the contents of the pot with a spatula. If you see that the color is not uniform, take the pot by the handles and shake it slightly from side to side to mix the caramel.
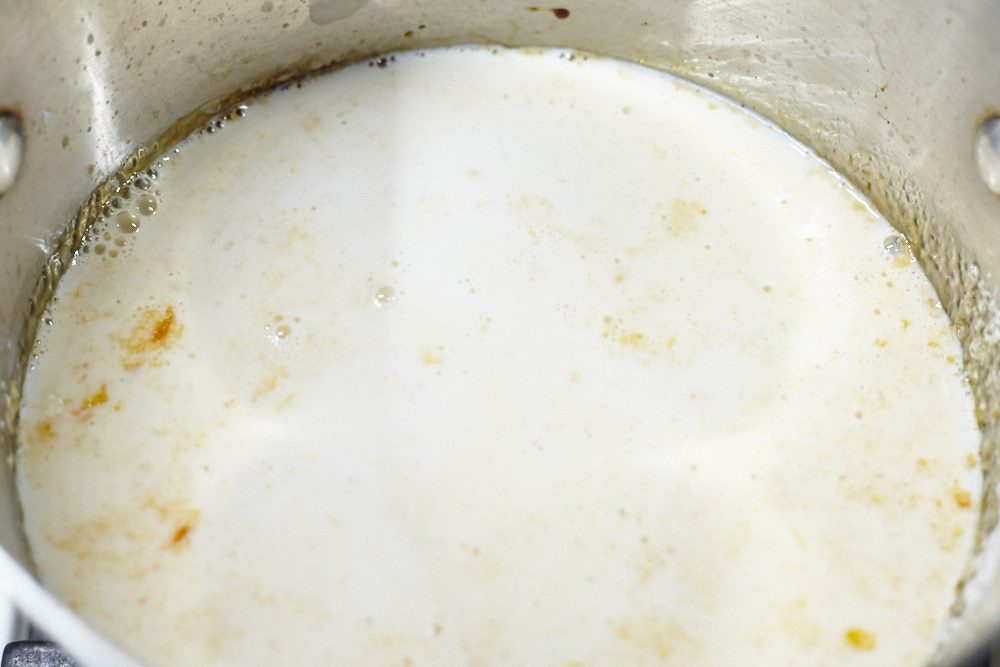
When the contents of the saucepan have become dark golden brown, turn off the heat and pour in 1 liter of milk. Pour very carefully, because the caramel mixture will bubble and try to fly out of the saucepan!

Once all the milk has been added, put the pot back onto a low heat added milk, stirring constantly so that the caramel dissolves. You should end up with a homogeneous light brown liquid.
At this stage, it is very important to stir the mixture constantly and not to let the milk boil.
Once all the caramel has melted, remove the pot from the heat.
Let’s take a few steps back now. While the sugar is melting in the pot, let’s do the yolks.
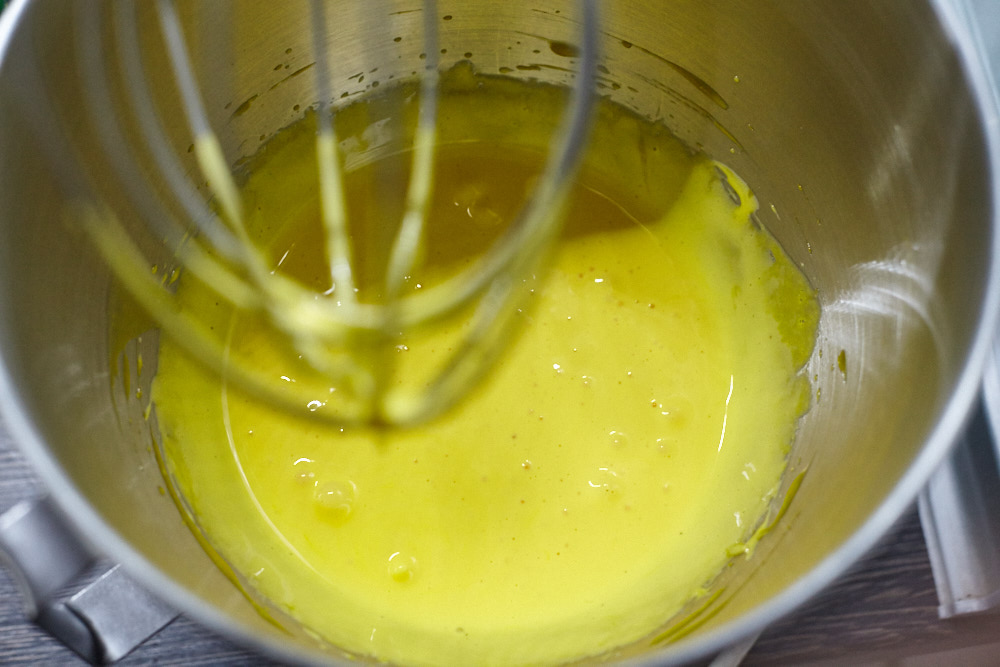
Separate the 12 yolks, place them in a mixer bowl and whisk until they become pale yellow and thick.
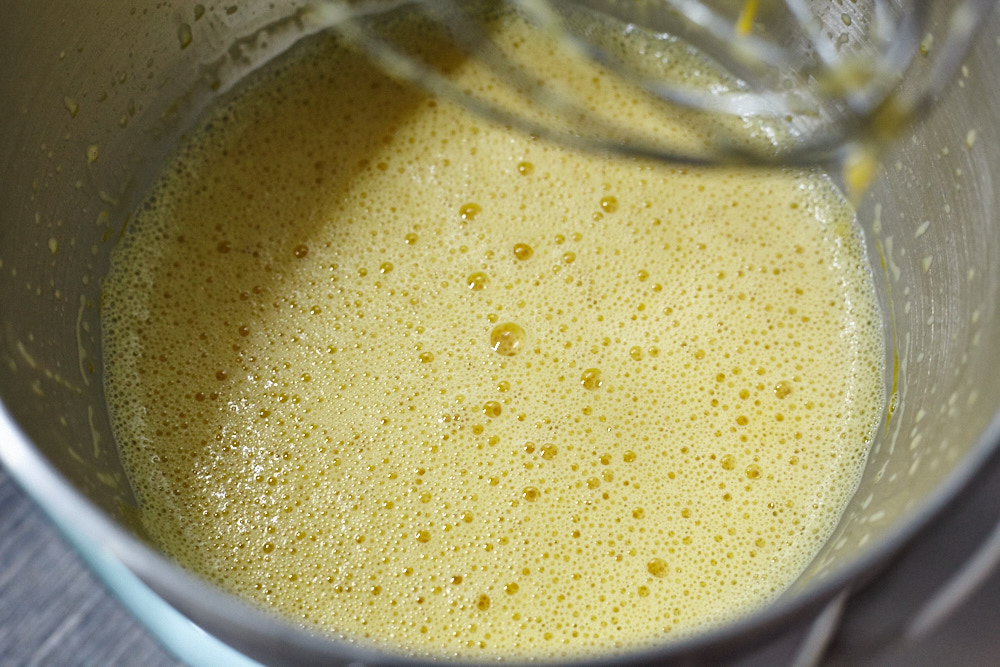
Pour a third of the hot milk and caramel mixture onto the yolks and beat for a couple more minutes to combine the ingredients. Pour the resulting egg and milk mixture back into the pot.
Put back onto a medium heat and stir constantly to bring the mixture to 80 degrees Celsius. Relax, I remember that I promised you won’t need a thermometer. Here’s how to determine the readiness: take a tablespoon, dip it into the contents of the pot and take it out immediately. Look at the back of the spoon. The custard should be thick enough to form a thin layer which does not run off the spoon. When you trace your finger over this coating on the spoon, the area should remain clean with clear, firm borders. This all shows that the custard has thickened and the egg yolks have cooked.
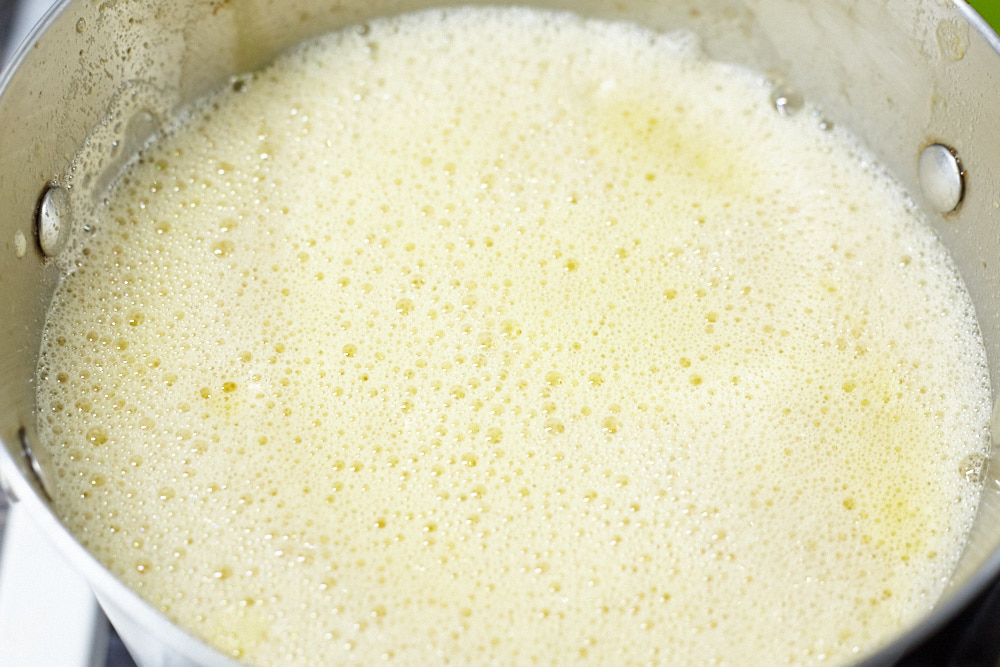
It is important not to let the custard overheat, otherwise the yolks will curdle. Once the desired temperature has been reached, remove the pot from the heat and cool it down in the fridge or in a container filled with ice.
Step 3. Cook Caramel
While the mixture is cooling, let’s do the second batch of caramel.
Repeat all that we did in the first step: measure the sugar, put it in a large saucepan, put it on the heat, cook down to a dark golden color. Only this time take 200 grams (7,1 oz) of sugar.
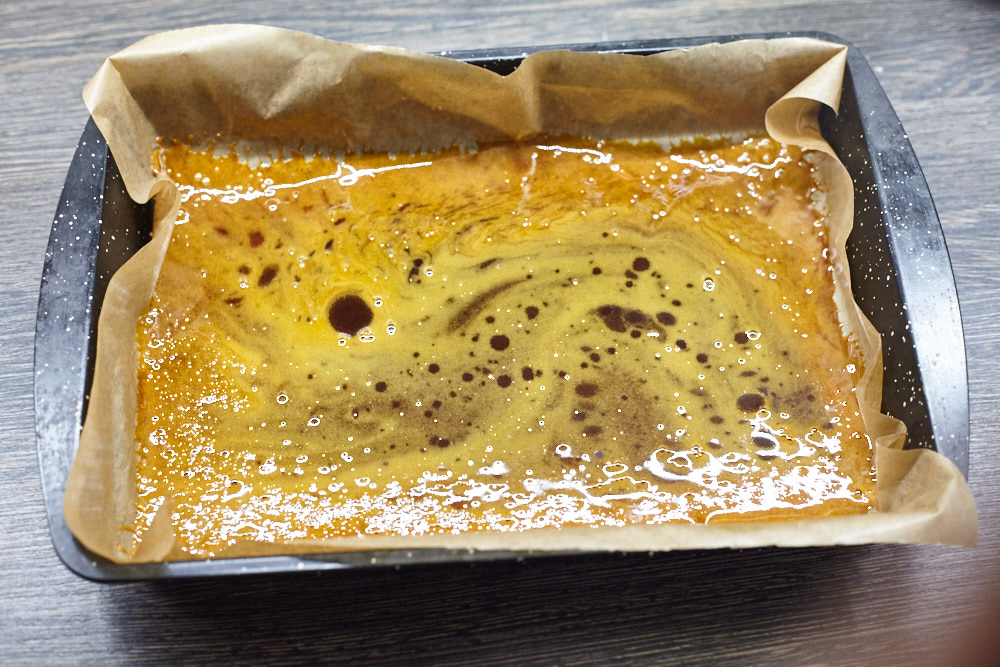
While the sugar is melting, take a suitable shaped tin, line it with parchment paper and grease it with a thin layer of butter.
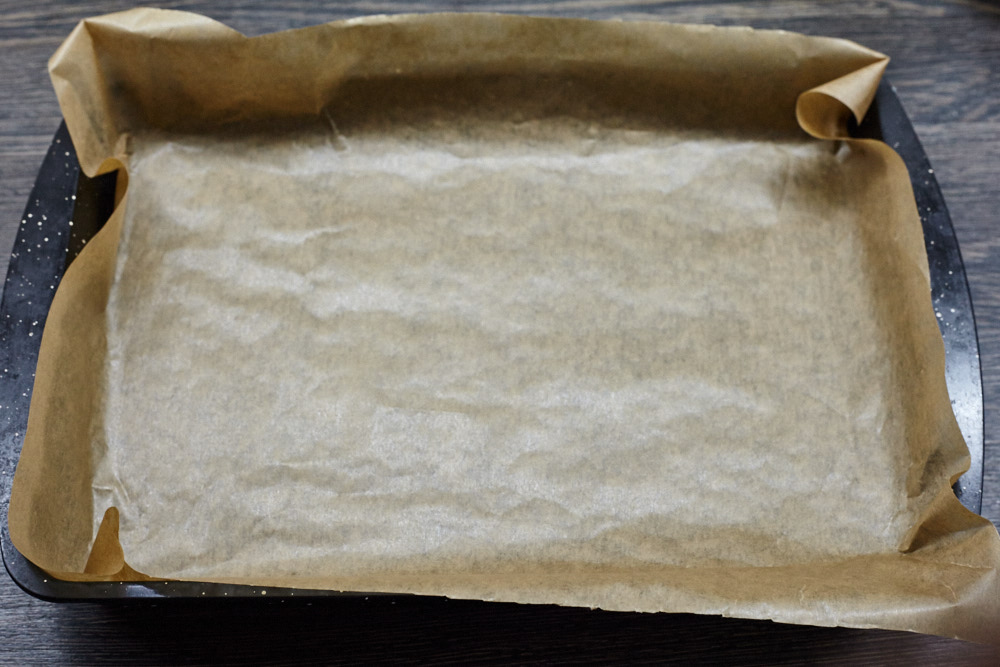
When the caramel is ready, pour it into the prepared mould and let it cool down.
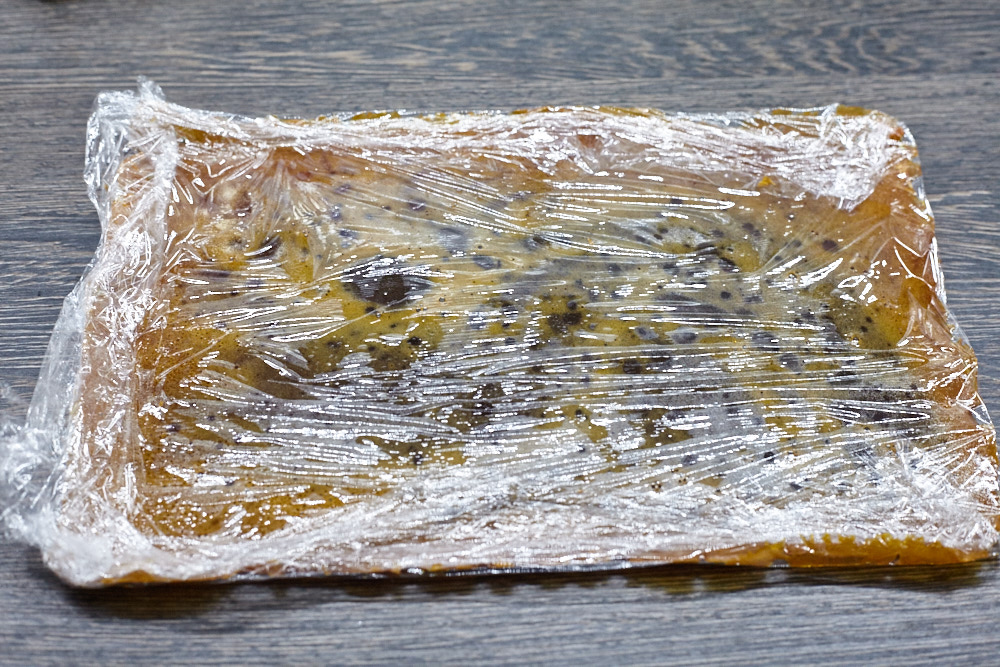
After it has cooled down, take the caramel out of the mold, remove the parchment and wrap the caramel in a piece of cling film. Place the caramel on a chopping board and crush the caramel into small pieces with a rolling pin.
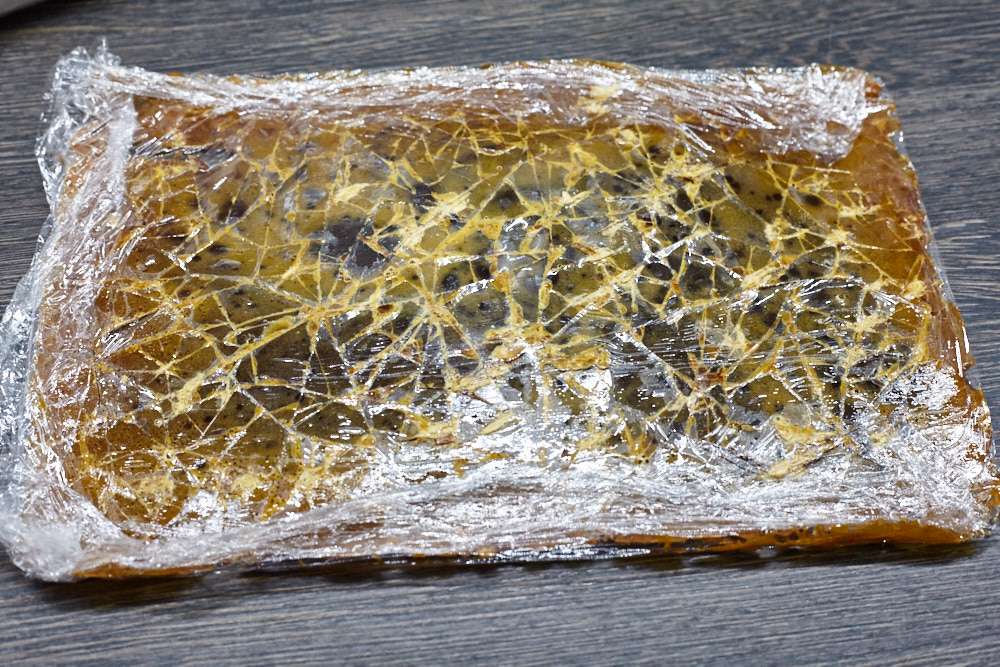
Do you see how big the pieces are? You need to break them up even smaller. I cooked mine late at night, when everyone was sleeping at home so it wasn’t possible for me to make any noise with the rolling pin.
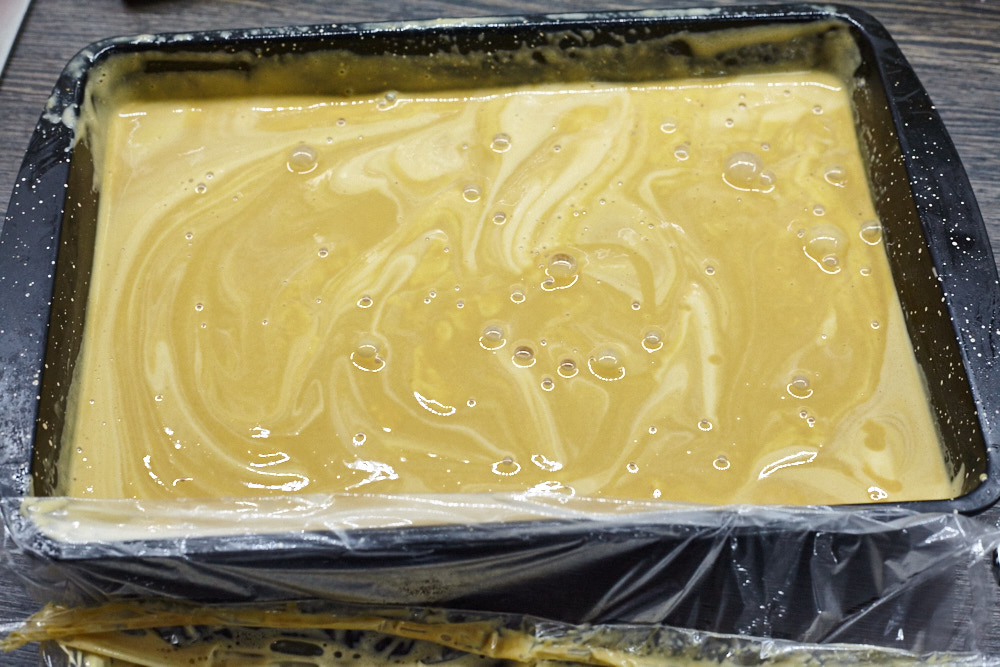
Step 4. Freeze the mixture
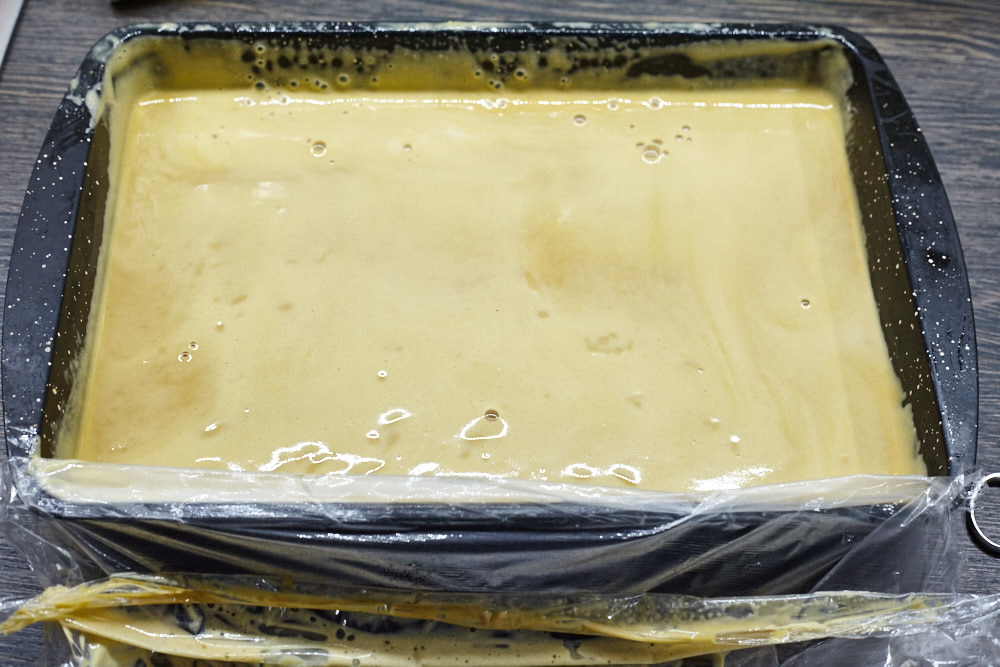
Take the caramel custard out of the fridge once it has cooled down enough, and pour it into the prepared mold that has been waiting in the freezer. The more the custard cools down, the better. It should be at least room temperature and definitely not warm. If you have extra time, keep it in the fridge until it’s cold.
If you use the super-freezing mode – put the mold with your custard mixture in for 30 minutes. If you don’t use the super freezing mode, extend the time in the freezer to 45 minutes.
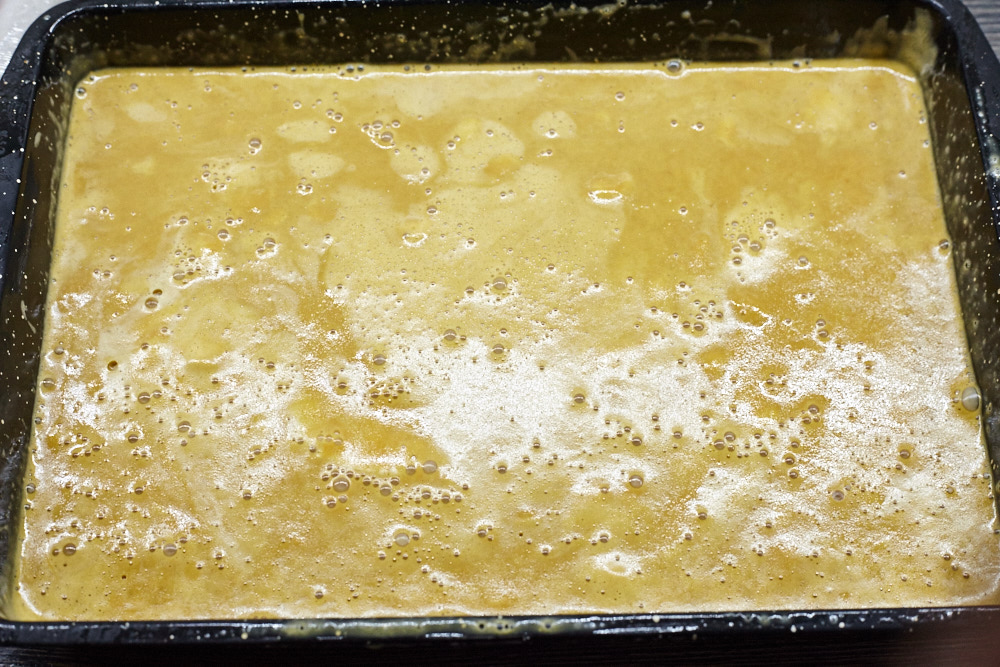
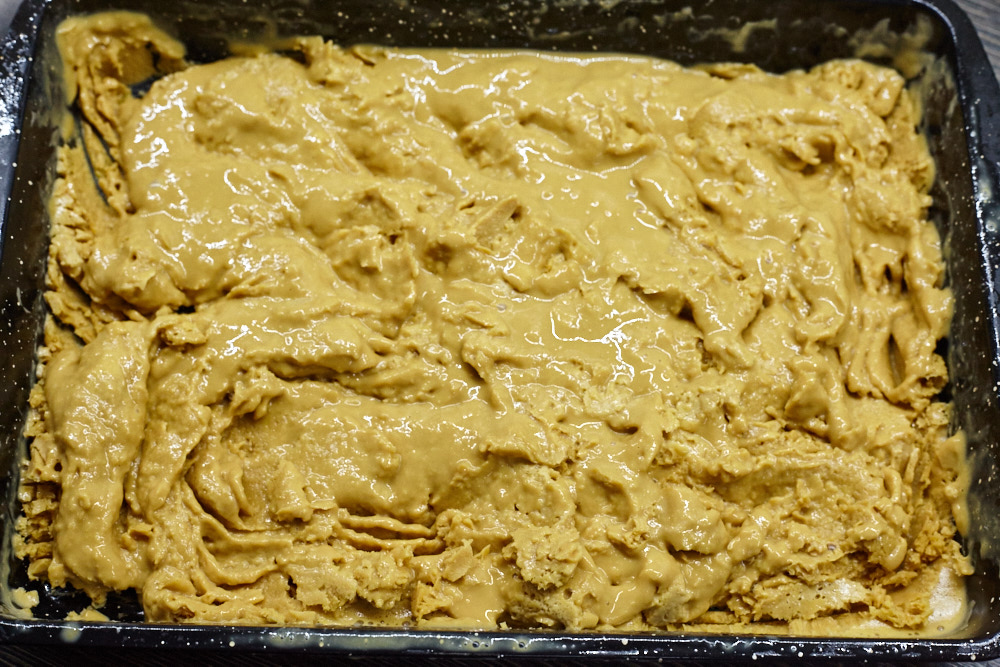
After this time, take out the container and stir the mixture. After that, every now and then mix as follows: scrape everything that has frozen on the walls and the bottom of the mold and mix this frozen mass with the more liquid part, trying to get the liquid part to the bottom and closer to the sides and the frozen bits in the middle.
Return the mold to the freezer.
For the next 2-3 hours (2 for super-freezing, 3 for normal) follow this procedure:
- When super-frozen, repeat the mixing operation 15-20 minutes
- For normal freezing, stir the mixture every 25-30 minutes
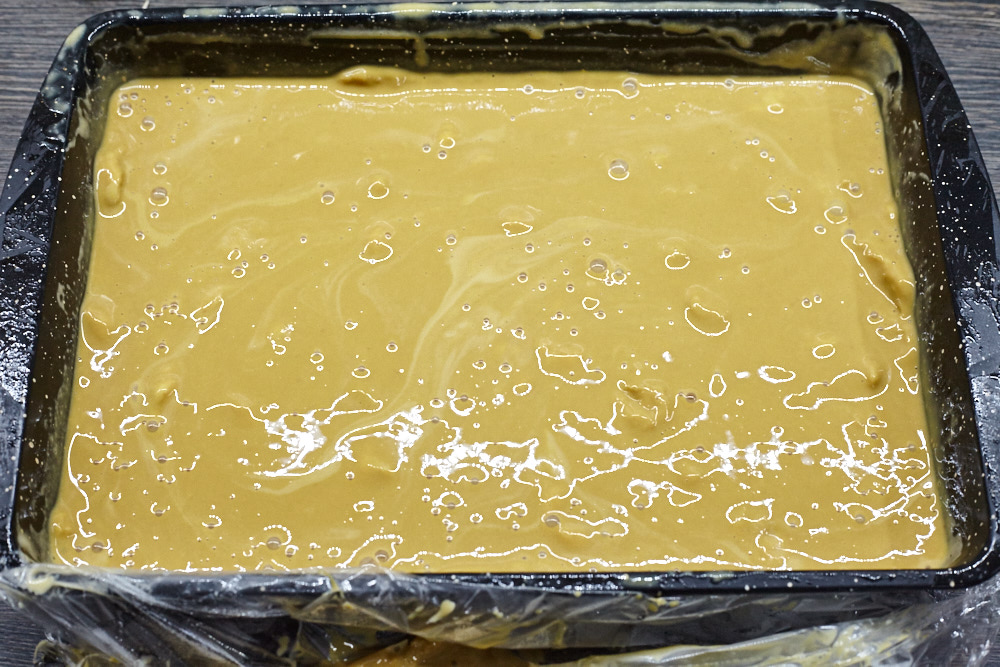

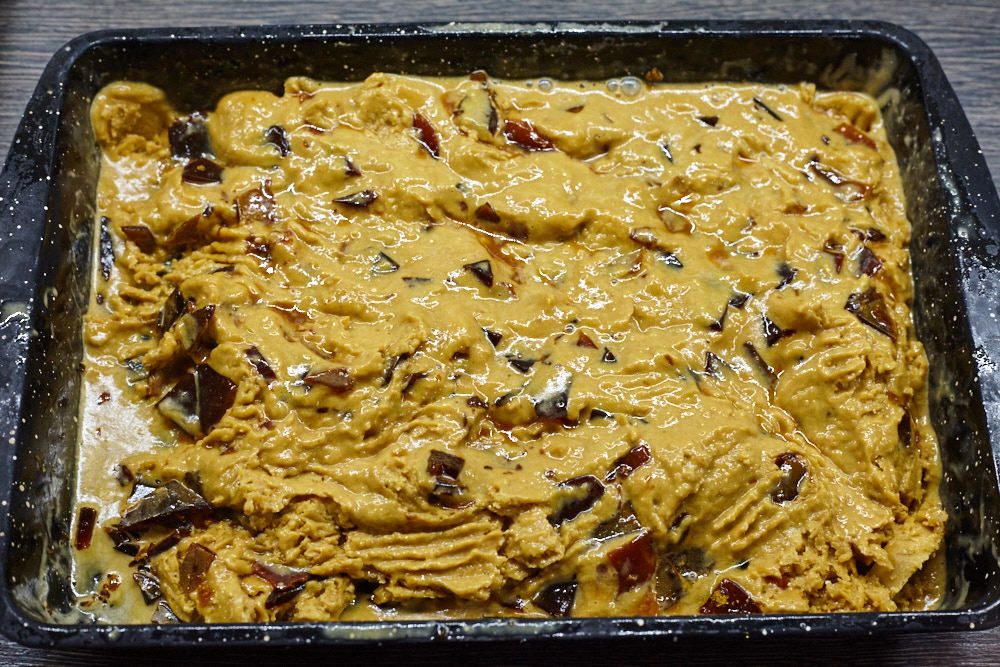
Half an hour before the expected completion of the freezing, when the mixture in the container will be similar to the last picture of mine – add the crushed caramel and stir. Return it to the freezer and continue following the instructions above, namely take out the mould after another 20-30 minutes and stir the contents once again.
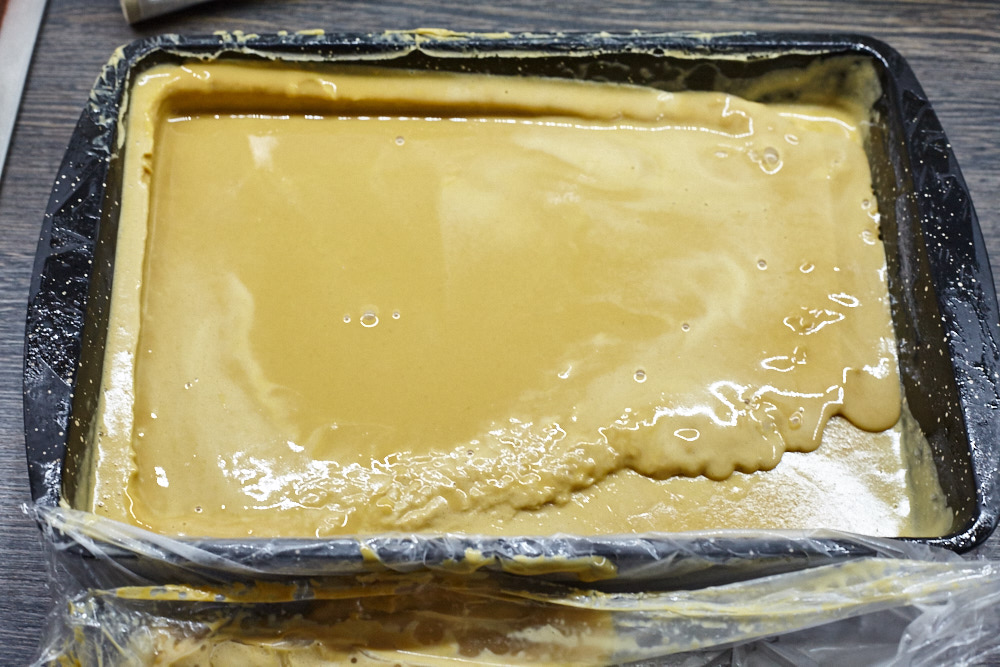
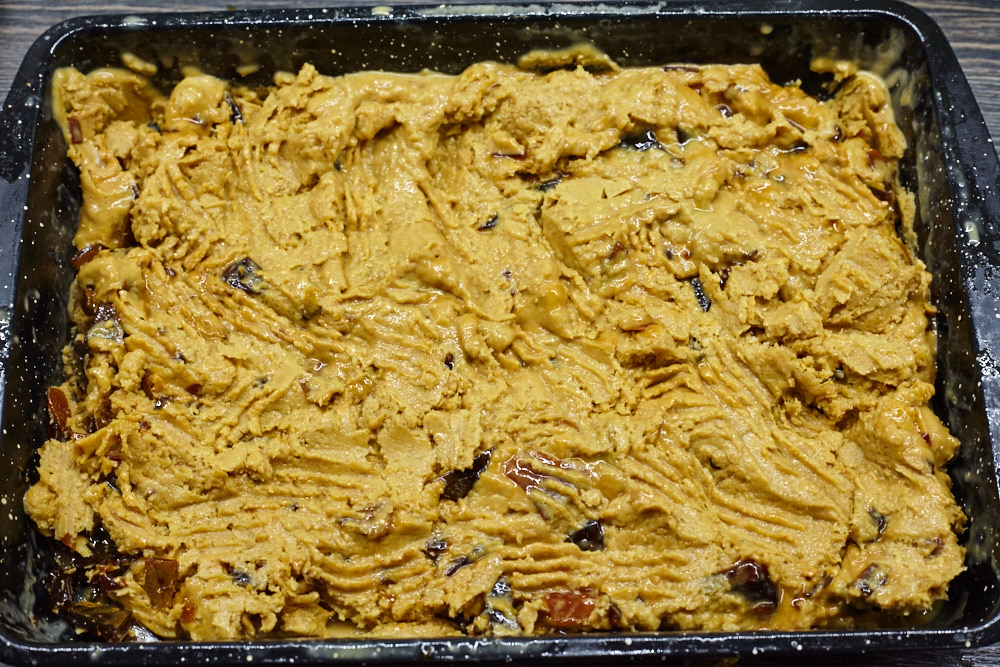
After this time, look at the resulting consistency: if the mass has become homogeneous, and evenly frozen, similar to ice cream – you have achieved your goal. If it’s not completely frozen, repeat the mixing procedure until it freezes.
Caramel Ice Cream with Crushed Caramel (Ice Cream Machine Not Required)
Equipment
- Mixer
- Kitchen thermometer
Ingredients
- 450 g white sugar
- 1 l whole milk
- 12 egg yolks
- butter for greasing
Instructions
- 5 hours before begining turn-on super freeze mode on your freezer and put a metal container into the freezer in which you plan to freeze the ice cream mix
- Measure 250g of sugar and place it in a large saucepan with a thick bottom. pour in a small amount of water and stir it so that the sugar makes one even, wet layer at the bottom of the pot.
- Place the saucepan on a medium heat and prepare the caramel: heat the contents without stirring so that they melt, bubble and become dark golden. At this step we don't need any specific caramel consistency, so a kitchen thermometer will not be needed.
- But if you have it - 160 °C (320 °F) is the temperature you need.
- When the contents of the saucepan have become dark golden brown, turn off the heat and pour in 1 liter of milk. Pour very carefully, because the caramel mixture will bubble and try to fly out of the saucepan!
- Once all the milk has been added, put the pot back onto a low heat added milk, stirring constantly so that the caramel dissolves. You should end up with a homogeneous light brown liquid. At this stage, it is very important to stir the mixture constantly and not to let the milk boil
- Separate the 12 yolks, place them in a mixer bowl and whisk until they become pale yellow and thick.
- Pour a third of the hot milk and caramel mixture onto the yolks and beat for a couple more minutes to combine the ingredients. Pour the resulting egg and milk mixture back into the pot.
- Put back onto a medium heat and stir constantly to bring the mixture to 80 degrees Celsius.
- Repeat all that we did in the first step: measure the sugar, put it in a large saucepan, put it on the heat, cook down to a dark golden color. Only this time take 200 grams of sugar. While the sugar is melting, take a suitable shaped tin, line it with parchment paper and grease it with a thin layer of butter.
- When the caramel is ready, pour it into the prepared mould and let it cool down. After it has cooled down, take the caramel out of the mold, remove the parchment and wrap the caramel in a piece of cling film. Place the caramel on a chopping board and crush the caramel into small pieces with a rolling pin.
- Take the caramel custard out of the fridge once it has cooled down enough, and pour it into the prepared mold that has been waiting in the freezer. The more the custard cools down, the better. It should be at least room temperature and definitely not warm. If you have extra time, keep it in the fridge until it’s cold.
- If you use the super-freezing mode - put the mold with your custard mixture in for 30 minutes. If you don't use the super freezing mode, extend the time in the freezer to 45 minutes.After this time, take out the container and stir the mixture. After that, every now and then mix as follows: scrape everything that has frozen on the walls and the bottom of the mold and mix this frozen mass with the more liquid part, trying to get the liquid part to the bottom and closer to the sides and the frozen bits in the middle.Return the mold to the freezer.For the next 2-3 hours (2 for super-freezing, 3 for normal) follow this procedure:When super-frozen, repeat the mixing operation 15-20 minutesFor normal freezing, stir the mixture every 25-30 minutes
- Half an hour before the expected completion of the freezing, when the mixture in the container will be similar to the last picture of mine - add the crushed caramel and stir. Return it to the freezer and continue following the instructions above, namely take out the mould after another 20-30 minutes and stir the contents once again.
- After this time, look at the resulting consistency: if the mass has become homogeneous, and evenly frozen, similar to ice cream - you have achieved your goal. If it’s not completely frozen, repeat the mixing procedure until it freezes.
Nutrition